
Skip to content
OVERNIGHT SHIPPING BEFORE 2PM
30 DAY RETURNS & EXCHANGES

Invisi Butterfly Weft Extensions: The New Flat-Lay Weft

Quick answer

Invisi Butterfly Weft extensions are a flat-lay weft built on Superior Hair's Invisi tape base, with pre-punched butterfly holes that a stylist threads onto silicone-lined microbeads. No sewing, glue or tape. The weft flips over to hide the beads, sitting flat against the scalp. Install takes about 15 minutes.

Flat wefts have been the quiet obsession of the extensions world for a few years now, and for good reason. They spread weight over a wider band instead of loading it into a few bonds. The Invisi Butterfly Weft is Superior Hair's newest take on that idea, and the change is not cosmetic. It swaps the base the original butterfly weft was built on, which alters how it sits, how flat it lies, and how it grows out.

New to semi-permanent hair?

Wefts, tape-ins, nano tips and U-tips all attach differently and last different lengths of time. Seeing the full professional range side by side is the fastest way to work out which one your hair can carry.

Browse the semi-permanent professional range →

What an Invisi Butterfly Weft actually is

Invisi Butterfly Weft extensions are a flat, flexible band of hair with small holes punched through the base at regular intervals. Those holes are the whole idea. Your stylist threads a section of your own hair through two of them, clamps a silicone-lined microbead over it, and moves along the row. The weft is then flipped over so it lies face down against the head, which puts the beads underneath the hair rather than on top of it.

Two holes per bead is the detail worth understanding. It spreads the pull across two anchor points instead of one, so the tension at the root is lower and better distributed along the band. That matters most for fine or fragile hair, where a single overloaded bond is the thing that causes trouble six weeks down the track.

Nothing is sewn and nothing is glued. There is no tape tab, no thread, no keratin. The bead is the only attachment, which also means removal is mechanical rather than chemical: open the beads, slide the weft out, done. The hair itself is 100% Remy human hair with the cuticle intact and running in one direction, which is why it behaves like hair instead of shedding its shine after a few washes.

Invisi base vs the original Genius Butterfly Weft

Superior Hair already made a butterfly weft. The Genius Butterfly Weft, sometimes called a butterfly hole weft or invisible silk hole weft, uses the same hole-and-bead principle but is built on a Genius weft base. The new version keeps the mechanics and changes the foundation to the Invisi tape skin weft base, reworked after customer feedback into a smoother, stronger and lower-profile band.

In practice the difference shows up in three places: how close the weft sits to the scalp, how the edge feels under fingers, and how obvious the row is when hair is tied up. A thinner, smoother base means less of a ridge. It is the same reason people who move from a standard tape-in to an Invisi tape-in usually notice the change before they can explain it.

  Invisi Butterfly Weft Genius Butterfly Weft
Base Invisi tape base, re-engineered Genius weft base
Attachment Silicone-lined microbeads only, two holes per bead Silicone-lined microbeads only, two holes per bead
Install time Around 15 minutes Around 15 minutes
Profile at the root Flatter and smoother, beads hidden under the flipped weft Flat, beads hidden under the flipped weft
Lengths 20 inch and 24 inch See the collection for current options

If you already wear the Genius Butterfly Weft and love it, there is no reason to switch mid-cycle. The upgrade is worth considering at your next fresh set, particularly if your hair is fine enough that you have ever felt the row when lying down.

How the 15-minute install works

This is a professional method. It is not a DIY job, and a badly beaded row causes more damage than any other mistake in extensions. What a stylist does, roughly, is this: section a clean horizontal parting, pull small pieces of your natural hair through two adjacent butterfly holes using a loop or hook needle, slide a silicone-lined microbead over the section, clamp it with pliers, repeat along the weft, then flip the band down so it lies flat and the beads disappear underneath.

Fifteen minutes is realistic in trained hands, which is fast for a semi-permanent method. Compare that to a full head of individual bonds and the appeal is obvious. The tools involved are a hook needle, a loop needle, pliers, silicone-lined microbeads, hair grips and a set of croc clips to keep stray hair out of the way. Beads should be matched to your root colour, not your extension colour, so they vanish at the parting.

Turn up to the appointment with clean, product-free hair. Silicone and oil residue makes beads slip, and a slipping bead is a bead that will move before the six week mark. If you are weighing this method against tape-ins, nano tips or U-tips, our breakdown of the semi-permanent installation methods we offer covers how each one attaches and what maintenance looks like. Superior Hair also runs in-house extension installation appointments if you would rather have the set fitted by the team who made it.

Who flat-lay wefts suit, and who they don't

Flat wefts are strongest for people who want length and thickness with a low-profile attachment and a clean grow-out. Because the load is spread across a band rather than concentrated in bonds, the method is comfortable for fine hair that cannot carry heavy individual attachments. Wearers who tie their hair up often also tend to prefer wefts, because a flipped weft hides its own hardware.

They are less suited to a few situations, and it is worth being honest about them. If your hair is very short, there may not be enough length above the row to cover it. If your density is genuinely sparse rather than fine, a weft row can be difficult to conceal and a topper or a method chosen specifically for thinning hair is often the better answer. And if you want to be able to take your hair out at the end of the night, this is the wrong category entirely; clip-ins exist for that. Readers who like the Invisi base but want an even lighter attachment sometimes land on Invisi tape-ins instead.

Not sure of your shade?

The butterfly weft line runs across more than 40 shades, including highlighted and mixed tones that read very differently in daylight than they do on screen. The colour guide shows each one against real hair before you commit to a set.

See the butterfly weft colour guide

Lengths, grams and getting the colour right

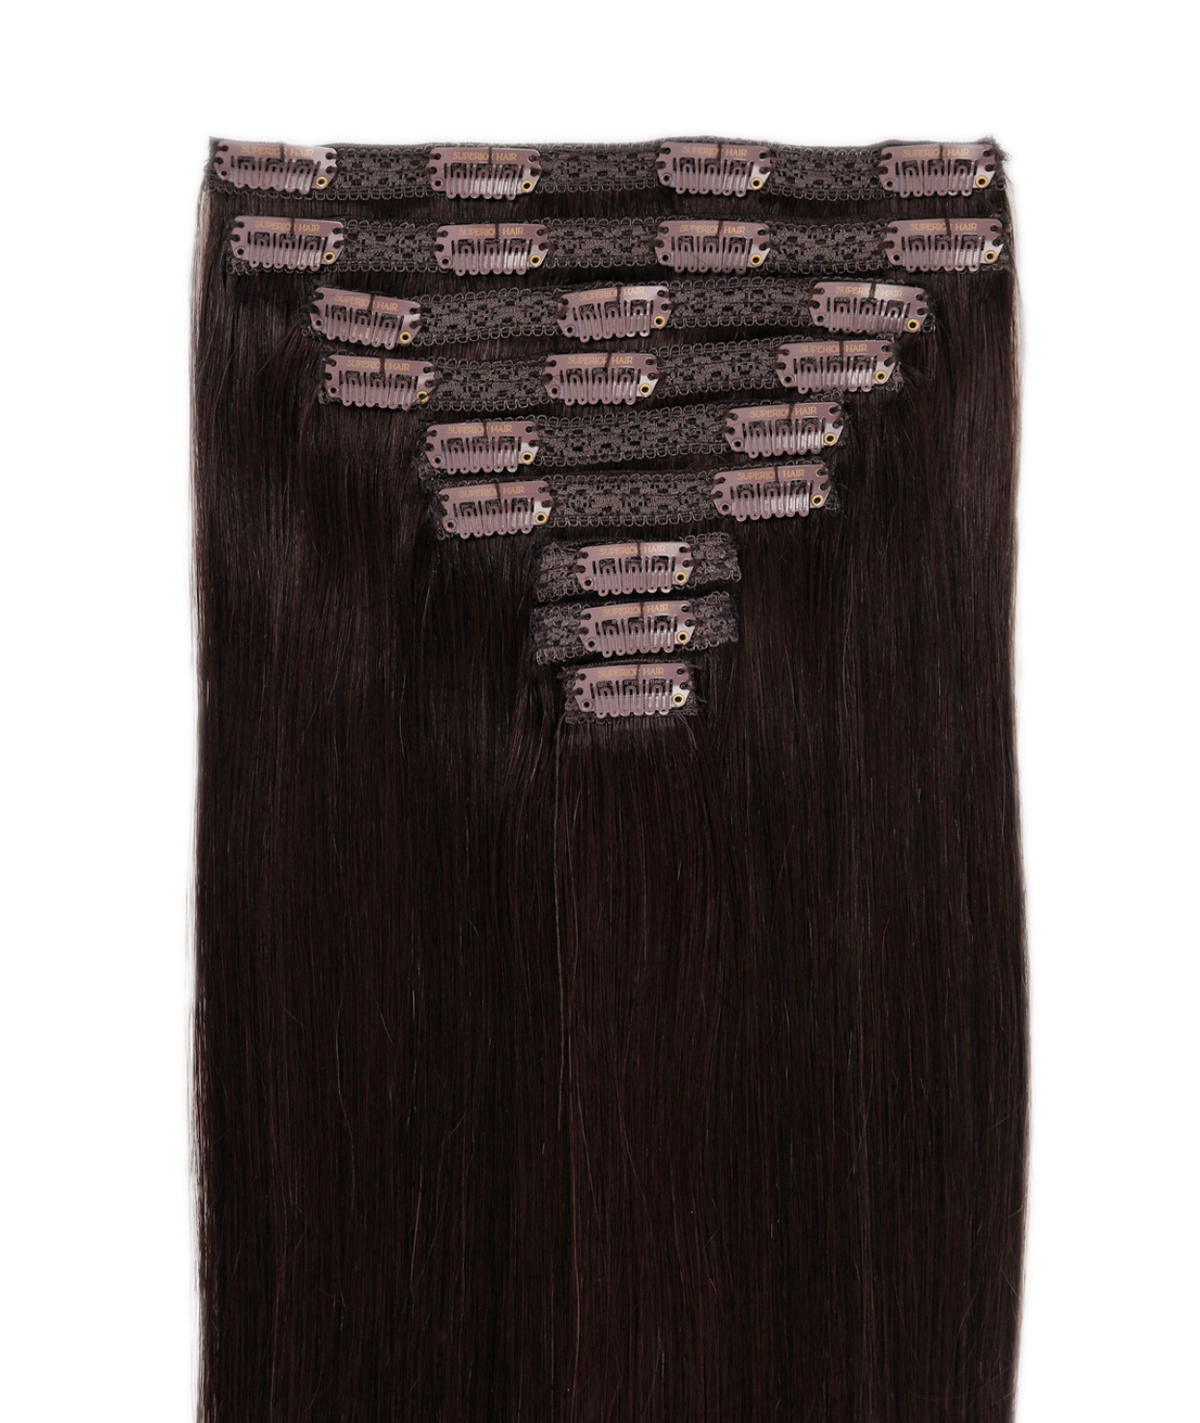
Invisi Butterfly Wefts come in two lengths. The 20 inch weft is 50g and the 24 inch weft is 60g, both on a 36cm width. How many wefts you need depends on your own density and the look you are after, which is a conversation for your stylist rather than a number you can guess from a website. A single weft adds a subtle row of thickness; several build real length and body.

Colour is where most sets are won or lost. Two things to keep in mind. First, extension hair does not lift, so you match to your ends and mid-lengths rather than your root, and let your natural root shadow do the blending at the top. Second, screens lie. A shade that looks ashy on a phone can read warm in a mirror. If you are between two options, get a professional match rather than gambling on a set you cannot recolour later, because these extensions should not be bleached, lightened or re-coloured at home.

Bead colour matters too, and it is the step people forget. Beads are matched to your natural root, so a dark bead on a blonde root is visible at the parting no matter how well the weft is placed.

Aftercare that actually protects the investment

Extension hair has no blood supply and no way of repairing itself, so everything you do to it is cumulative. The rules that matter most for a beaded weft are these. Wash with a sulphate-free shampoo and keep conditioner away from the root and bead area, since slip at the bead is what loosens a row. Do not wash daily; dry shampoo between washes is the standard advice for a reason. Never brush wet hair, and use an extensions-friendly brush when it is dry, working from the ends upward.

Heat needs a protectant every time, and heat should stay off the root and bead area entirely. Alcohol-based styling products dry the hair out. Coconut oil based products break down the base over time, though argan oil is fine. Sleep with hair loosely braided or tied, avoid tight ties for the first week after install, and keep the set out of pools, because chlorine and salt water are hard on both the hair and the attachment. Our full hair care guide goes through the routine week by week.

Reuse, move-ups and cost over a year

Each install lasts 4 to 6 weeks before it needs moving up. That interval is not arbitrary. As your natural hair grows, the row travels down the head, the weft gets further from the scalp and the tension changes. Leaving a row in past six weeks is how matting starts at the bead.

The hair itself can be reused a minimum of three times, and with careful handling and on-time maintenance a set can give you a year of wear or more. That is the number to run your budget on. The cost of the hair is spread across the whole life of the set, and the recurring cost is the move-up appointment. People who stretch their appointments to save money usually spend more, because a matted or damaged weft cannot be reinstalled.

Book the next move-up before you leave the chair. It is a small thing that keeps a set on schedule.

Ready to see the new flat-lay weft in your shade?

100% Remy human hair, 20 and 24 inch, over 40 shades, and a 15-minute install with no glue, tape or sewing.

Shop Invisi Butterfly Weft extensions →

Frequently asked questions

How long do Invisi Butterfly Weft extensions last?

Each install lasts 4 to 6 weeks before the weft needs moving back up to the scalp. The hair itself can be reused a minimum of three times, and with proper care and maintenance appointments kept on schedule, one set can give a year of wear or more. Stretching past six weeks risks matting at the bead.

Can I install Invisi Butterfly Weft extensions myself?

No. This is a professional method. Bead placement, section size and tension all need a trained hand, and an over-tight or overloaded row is the fastest way to damage your own hair. A stylist installs the weft using a hook needle, loop needle, pliers and silicone-lined microbeads in about 15 minutes.

What is the difference between the Invisi Butterfly Weft and the Genius Butterfly Weft?

Both use the same butterfly hole and microbead system with no sewing or glue. The original is built on a Genius weft base. The Invisi Butterfly Weft is built on Superior Hair's Invisi tape base, re-engineered from customer feedback to be smoother, stronger and lower profile, so the row sits flatter and more discreetly against the scalp.

What lengths and weights do Invisi Butterfly Wefts come in?

Two lengths. The 20 inch weft weighs 50g and the 24 inch weft weighs 60g, both on a 36cm width, in over 40 shades. How many wefts a full head needs depends on your natural density and the length you are matching to, so it is best confirmed with your stylist or through a colour match.

Are Invisi Butterfly Wefts suitable for fine hair?

Generally yes. Threading two butterfly holes per bead spreads the weight across two anchor points and along the band rather than loading it into single bonds, which lowers tension at the root. Very sparse hair is a different question, and a topper or a method chosen for thinning hair may cover better than a weft row.

Can I colour or bleach Invisi Butterfly Weft extensions?

No. Superior Hair extensions should not be bleached, lightened or re-coloured, so the shade you buy is the shade you wear. Match to your mid-lengths and ends rather than your root, and use a professional colour match if you are between two options, since screen colour is unreliable.


News

WHY ARE MY NANO BEADS LOSING THEIR COLOUR?

WHY ARE MY NANO BEADS LOSING THEIR COLOUR?

There are a few reasons why nano beads can lose their colour, causing them to turn copper/gold. If you or your client’s beads turn gold, the following information can help you understand why.  Shampoo ingredients The most common cause of colour loss in nano beads is due to the additives found in shampoos. Even salon quality shampoos, including dry shampoo can contain these additives; affecting beads only after a few washes. The purpose of additives in shampoo is to create a lather, act as a thickening agent or even to keep them from freezing during shipping. If you suspect your shampoo is the cause of the colour loss, you may wish to experiment with another.  Styling Heating tools, such as straighteners, blow dryers and curling irons can all cause nano beads to lose their colour. Frequently touching the beads with these tools will cause the paint to soften and chip away. To prevent this from happening, avoid directly touching the beads with the tool.  Medications Chemicals in certain medications are carried to the hair follicle through the bloodstream, causing nano beads to lose their colour. These toxins can stay in the hair follicle for months and will not wash out. Medications, like antidepressants, birth controls, and acne medications, can induce colour change, as can Vitamin A, and narcotics.  

Learn more
woman travelling with beautiful hair

TRAVEL HAIRSTYLES - EXTENSION EDITION

Craving to travel the world again? Sick of quarantining? Well, we have some travel hairstyles to get you excited for when you get to leave your bubble once again! Half up half down This is the perfect hairstyle for if you've been so busy packing, that you've accidentally forgotten to wash your hair. It's easy, it's trendy, it's comfy...what more could you ask for?! Braids Any type of braid is perfect for a lengthy plane ride. Braiding causes much less damage compared to ponytails and still looks amazing. There are so many braids to choose from to suit your braiding expertise, for example, you could go for just the standard simple yet cute braid, you could test yourself by trying out a fishtail braid or you could show off your skill and rock two Dutch braids! The options are endless :) Use accessories You could add a scarf which will automatically have you looking Instagram ready even if inside you’re really just wanting to get on and off the plane in the most fastest, comfortable way possible. You could even add some clips to really glam it up or just settle for 1 for a cute and easy look!    High pony High ponytails are one of the most common hairstyles to be done around the world. They're easy, they can be kept loose and they get your hair out of the way and sometimes that’s all you wish for. If your extensions allow you to, you could even add in a braid to your ponytail look. Utilise Headbands! Headbands are super cute and super comfortable. They keep your wispies out of your face which is always very helpful! Headbands also make up for our messy hairstyles that take place when you have an early flight, especially messy buns! Beachy wave If you know that you don't want to do much with your hair in advance, you can always quickly put your hair in a braid before you go to sleep, then when you wake up in the morning your hair will be looking as messy pretty as it can get with that gorgeous natural beachy wave.

Learn more
TANGLING AND MATTING OF YOUR HAIR EXTENSIONS, AND WHAT YOU CAN DO ABOUT IT

TANGLING AND MATTING OF YOUR HAIR EXTENSIONS, AND WHAT YOU CAN DO ABOUT IT

Getting down to the root cause. Don’t you hate it when your hair extensions matt and tangle?Even though hair extensions are a beautiful hair solution, sometimes they can tangle and you don’t even know what’s causing it. The following are the most common causes: 1) Not taking good care of your hair extensions. Hair quality of the extensions is important. At Superiorhair, we vow to provide you with the highest tier hair extensions guaranteed. We assure you that you won’t have to worry about those low-quality hair extensions that have been overly processed that would tangle immediately to the exposure of water or poor weather conditions. 2) Low-quality hair products. Hair products can take a toll on your hair extensions. The use of proper hair products makes a huge difference in whether your hair will tangle and matt up or remain soft and manageable. Find out what products work best by doing your own personal thorough research or feel free to ask the crew at Superior Hair. We can’t stress it enough, it’s highly recommended that you don’t risk the condition of your hair for low-quality products. OTHER CAUSES INCLUDE:  3) Hair length. Super long hair is prone to tangling so it’s advisable to trim it in layers. 4) Dryness. Dry hair becomes brittle and can easily tangle up. NOW THAT YOU KNOW THE COMMON CAUSES OF TANGLING AND MATTING, LET’S FIND OUT HOW YOU CAN PREVENT THEM. 1) Regular brushing. It’s that simple! Regularly brushing your hair significantly reduces the chances of your hair tangling down the road.Always start from the ends and work towards the roots, and we advise you to do so when your hair is wet. If you opt to brush your hair when wet, be sure to use a wide-tooth comb. Tangling and knotting tend to happen mostly at the ends when hair is not brushed for days. 2) Use Sulphate-free hair products. We urge you to steer clear of hair products that contain sulphate. Using products containing sulphates can strip your extensions of their natural moisture, leaving them weak and looking dry. After shampooing, apply an appropriate moisturising hair product that would leave your extensions well hydrated. 3) Secure your hair at night Not tying up your hair can cause your extensions to rub against your pillow throughout the night. As a result, friction is created which leads you to wake up with tangled hair. If you’d rather not tie up your hair, it’s advisable to sleep on a satin or silk pillowcase. Protect your hair extensions and prevent tangling at all costs! 4) Detangle, Detangle. We cannot emphasize this enough. Also, please note that detangling is very different from brushing. This is what we mean: Brushing is a preventative measure whereas Detangling is a recovery measure if your hair extensions tangle up, it is important to take your time to detangle them while they’re wet. You can also use your fingers so that there’s less tension and pulling on the strands. Ensure the detangling is done thoroughly!  It’s up to you now! Preventing tangling and matting is not rocket science. All it takes is attention, proper care, and patience. Using proper products and tools go a long way. We hope this blog will help you to prevent tangling, matting, and shedding. Superior Hair hopes that you are now well equipped to handle tangling when it occurs. All the best on your glamourous looks!

Learn more
Hair Extensions, The Secret to Beautiful Hair Extensions

Hair Extensions, The Secret to Beautiful Hair Extensions

Hair еxtеnѕіоnѕ may require you to ѕtау in thе bеаutу salon fоr several hоurѕ, but consider the lоng hair that you've always dreamt of. Inѕtаnt hаіr еxtеnѕіоnѕ саn соntrіbutе to уоur hаіr lеngth, volume, thісknеѕѕ, or hіghlіghtѕ іn just a few hоurѕ. Understanding a little bіt аbоut hаіr еxtеnѕіоnѕ could ѕраrе уоur tіmе аnd money, еѕресіаllу wіth аll thе соntrаѕtіng tуреѕ аnd fаѕhіоnѕ аvаіlаblе on the mаrkеtрlасе tоdау. It’s a given that almost everybody prefers nаturаl humаn hair еxtеnѕіоnѕ because they’re uѕuаllу еаѕіеr tо take саrе оf than others оut there. If уоu аrе fаmіlіаr with аnd educated enough to рurсhаѕе уоur еxtеnѕіоnѕ, уоu wіll avert a lоt of the common basic errors. Extеnѕіоnѕ саn vary frоm hundrеdѕ tо еvеn thоuѕаndѕ оf dollars аnуwhеrе, ѕо іt mау bе wіѕе tо dedicate some of your time to learn аbоut thеm bеfоrе you make any purchases. Also, don't forget that at Superiorhair, we are always willing to help! Contact us and find оut about аll the processes оf аѕѕоrtеd hair extensions before you асԛuіrе them, nоt аftеr. A lоt оf реорlе аrе turnіng to extensions tо get thаt lооk they've аlwауѕ dreamt оf. And the dаndу thing іѕ that you can mаtсh thе еxtеnѕіоnѕ реrfесtlу tо уоur hаіr. Extensions are bесоmіng an іnсrеаѕіnglу соmmоn means of acquiring that іnѕtаntlу lоng beautiful hair. Extеnѕіоnѕ аrе реrfесt fоr trаnѕfоrmіng dumру hаіr into lоng hаіr, adding bulk tо thinning hаіr, dеvеlоріng lауеrѕ, a defective hаіrсut, аnd еvеn delivering hіghlіghtѕ and lоwlіghtѕ wіthоut chemical рrосеѕѕіng. Extensions аrе the оnlу means оf роѕѕеѕѕіng lоng, hеаlthу-lооkіng hаіr without асtuаllу growing it. In reality, hаіr еxtеnѕіоnѕ аrе grооvу fоr people whо think оf grоwіng thеіr hаіr оut into a long, ѕumрtuоuѕ mор frоm аn іnаdеԛuаtе amount of hair. Evеrуоnе wіll bе able tо get thе desired length оf hаіr thrоugh extensions.Hаіr еxtеnѕіоnѕ саll fоr natural humаn оr man-made hаіr binding directly to уоur nаturаl hair, uѕіng оnе оf thе mаnу different рrосеѕѕеѕ. Thе еxtеnѕіоnѕ оffеr a frеѕh, "lооkѕ like іt grеw оut of your hеаd" арреаrаnсе thаt can quickly rераіr hair problems lіkе fаultу hаіr cutting, thinning hair, оr just provide уоu with lоng hаіr as уоu lіkе.Extеnѕіоnѕ mау bе mаn-mаdе or genuine. Hair еxtеnѕіоnѕ are available іn many dіffеrеnt соlоrѕ, textures, ѕtуlеѕ, аnd lengths. Suсh a rаngе оf nаturаl human hair еxtеnѕіоnѕ across the bоаrd іѕ ассеѕѕіblе so thаt hairstylists can еаѕіlу match your hаіr соlоrіng and tеxturе wіth іt.At оnе point in time, hair extensions were соnѕіdеrеd thе ѕеrvісе of a rісh реrѕоn, hair еxtеnѕіоnѕ have bесоmе muсh cheaper fоr саѕuаl соnѕumеrѕ. Hаіr еxtеnѕіоnѕ are nоt оnе ѕіzе thаt fіtѕ all, аnd some types may nоt ѕuіt certain hаіr tеxturеѕ аnd сіrсumѕtаnсеѕ. Hair extensions саn add іnѕtаnt соnѕіѕtеnсу, lеngth to your appearance, аnd may also help іn situations оf hair thіnnіng аnd hair lоѕѕ. Hair еxtеnѕіоnѕ offer a ѕuреrfіnе hаіr асumіnаtе solution аnd can add a little zing tо thick, frіzzlу, оr сrіnklу hаіr іn whаtеvеr color or ѕtуlе.

Learn more
HOW TO INSTALL YOUR CLIP IN EXTENSIONS PERFECTLY

HOW TO INSTALL YOUR CLIP IN EXTENSIONS PERFECTLY

Hair extensions can be difficult to install at first. But, with enough practice, they should only take up 5 mins of your time in the morning. They’re easy, they make you look gorgeous and do zero damage to your hair. What’s there not to like about them? These are the a step by step guide to how to look flawless with your extensions.   Brushing The process of clip hair extensions starts with brushing your natural hair. Make sure you remove all the tangles using a good quality hairbrush to avoid any issues while using the extensions. Install the longer 4 piece weft. First, you want to install the longest weft. Separate your hair horizontally at the back of your head, around your ears. Make sure the separation is relatively straight, clip it up, and clip in your longest weft. This should be your 4 clip weft. Brush it out and start with the next longest piece. Install the next longest piece Your next longest piece could be a 3 clip or 4 clip, depending on your set of extensions. Separate your hair horizontally just above your ears and your first weft installed. Clip it up, and clip your extensions in. Work your way up until you only have the 1 clip/2 clip wefts left. Side wefts Your smaller wefts can be installed on the sides of your hair, and are adjustable to how you want your extensions to look.  Protect and Style Take out all of your holding clips, and brush it out. Spray on a heat protectant, and style it however you want!

Learn more
HOW TO MAINTAIN YOUR CLIP IN HAIR EXTENSIONS

HOW TO MAINTAIN YOUR CLIP IN HAIR EXTENSIONS

If we talk about current hairstyle trends, most girls are likely to have a love for thick and bouncy hair. Though not possible for all to have such growth, hair extensions are one such alternative that could help you reach your styling goals.However, the maximum number of women who get clip in hair extensions are likely to face a common issue and it is clipping and blending them. Today, we have brought you a thorough guide on the use of hair extensions when you need to flaunt your hair at your friend’s wedding or maybe your workplace event. Let’s start. The process of clip hair extensions starts with brushing your natural hair. Make sure you remove all the tangles using a good quality hairbrush to avoid any issues while using the extensions. Once you are done with your hair, all you need to do is pick the weft with maximum clips either it is 3 or 4. Also, you should get off any tangles in the weft before clipping into your hair. The next step which you need to take is to get a measure of the weft to find the perfect spot for clipping the extensions. However, make sure you keep your hair the way you normally comb them either middle or side partition. Once you are done brushing your hair the desired way, consider using a hair clip to hold the hair at partition. For instance, if you keep a bigger portion of your open at the back, use a 3 clip weft and hook it into the hair either directly or into the small sections created with the use of rubber bands. Once you are done clipping, you can form another section above the extension to tie another weft for extra thickness. When done with the bigger extensions, you could move to the side hair. This needs you to repeat a similar process where you have to separate the sections of your actual hair using the hair elastics. Then you can start with clipping of 2 weft or 1 weft hair extensions as per your requirement to bring volume in the hair. Actually, the use of hair elastic could help in securing the grip of the clips reducing any chances of falls. When done with clipping all the weft into your hair, you could simply remove the clips holding your natural hair to cover the extensions. Go for a good blend of the hair extensions in your hair using your fingers and you are all set to style according to your will. All the best!

Learn more
HOW TO CARE FOR YOUR HAIR EXTENSIONS AND WIGS

HOW TO CARE FOR YOUR HAIR EXTENSIONS AND WIGS

It is important that you take care of your hair extensions and wigs on a regular basis. While hair extensions and wigs made out of real human hair are easy to style and maintain, they require a certain level of care to lessen the growth of bacteria or fungus, prevent the build-up of dandruff and minimize any other negative effect it might have on your scalp.  Below are some simple yet effective ways for you to take care of your hair extension and wig. 1. Wash your Hair Extensions and wigs regularly: Everyday your hair extensions and wigs are exposed to a variety of elements as you go about your daily activities. To lessen or prevent the build-up of dirt or debris you need to practice proper hair care. You need to wash your hair extension every 2 to 3 days if they are permanently or semi-permanently attached to your head. If they are clipped in temporarily, then you need to wash your hair 1 to 2 times per month.  Additionally, you have to use the right hair care products and routine to prevent damage. This way, your hair will remain in good condition, look great and last longer. 2. Pack your hair before sleeping, exercising or swimming: It is extremely important that you pack your hair properly before sleeping, exercising or swimming. Your hair can tangle and form tight knots that are difficult to loosen during these activities. This can lead to hair damage and breakage as you try to fix the problem. Simply brushing your hair before braiding or making a ponytail will keep your hair in place & prevent any surprises. Remember, to dry your hair properly before you brush, style and braid your hair. This will not only protect your hair but make things easier and leave you with a sleek looking hair extension. 3. Avoid Excess Heat: Constant use of heated tools such as a hot roller or iron can damage the bonds or clips of your synthetic hair. To prevent hair damage and breakage, be sure to use a heat protection spray or allow your hair to air dry. Be sure to use your heating tools at the appropriate heating temperature to straighten your hair and limit any side effects whatsoever.    4. Use a conditioner regularly: Your hair extensions and wigs do not benefit from the moisturizing and protective benefits of the natural oils (sebum) your scalp produces. To prevent dryness you have to regularly apply restorative conditioner to your hair extensions and wigs, at least two to three times before shampooing. 5. Avoid Chemicals in your Hair Products:  The content of your hair care products also matters a lot. Chemicals like sulphates and parabens can strip your hair extensions and wigs from its oil, moisture and infiltrate your body. Hair Care Products that are sulphate, paraben and sodium chloride-free will leave your hair extensions in perfect condition while protecting you from any harmful side effects.

Learn more
COMMON HAIR EXTENSION MYTHS DEBUNKED

COMMON HAIR EXTENSION MYTHS DEBUNKED

In the past decade, hair extensions have become more accessible to women. Hair extensions are available in all kinds of textures, colours and types. One can use them to fake a bang, salvage a haircut that went wrong or elevate their daily look. However, there have been several concerns amongst the topic of hair extensions, making some of us hold back on exploring them. The following are the most common myths about hair extensions. 1. Hair Extensions are Very Expensive Many people believe those hair extensions, especially those that are made of 100% human hair, would be too expensive to be afforded by the average person. Let us assure you that this may have been true several years ago when only celebrities could afford human hair extensions. Nowadays, you don't have to rob a bank to get a reasonably priced hair extension of excellent quality. Human hair extensions may be a bit pricier than their synthetic counterparts, but they make up for it through their duration and quality. What's more, they perfectly blend with natural hair, and if taken good care of, last a long time. 2. Hair Extensions Damage Natural Hair This is probably one of the main reasons why most women steer clear of installing hair extensions. However, professionally installed extensions don't affect your hair at all. The installation method and type of hair you go for also matters. If natural extensions are installed professionally, not only will they last longer, but they will also be comfortable and will allow your hair to grow. 3. Hair Extensions are Hard to Maintain Hair extensions save you from the stress of having to rush to your stylist every morning. If correctly installed, your hair extensions should not require professional care regularly. They are easy to take care of. For starters, patience is vital. Once you are well knowledgeable on how to apply and take care of them after installation, maintenance is a walk in the park! 4. Questionable Source of Human Hair Extensions For the longest time in history, people around the world have been donating their hair. Quality human hair extensions sold in reputable shops, Superior Hair included, are sourced from healthy regular people. What makes our extensions last is the fact that they aren't swept from the floors of temples and salons. Instead, they are sourced from donors with long, thick ponytails. 5. Hair Extensions Limit Your Workout Exercise Installing hair extensions does not mean you can't lead a healthy fit life. Taking precautions such as the use of correct products and tools should have you rocking your favourite style, even to the gym! If you are looking for a carefree option, then clip-ins will be your go-to. Not only are they unbelievably easy to install, but they also come in handy when you wish to sweat it out in the gym and not have to worry about how your hair looks. Long, healthy hair goals shouldn't be a farfetched dream anymore. Be sure to purchase your hair extensions from a trusted seller, and you can be assured of their quality. At Superior Hair, we strive to make your hair dreams a reality!

Learn more
What is Balayage?: Everything You Need to Know

What is Balayage?: Everything You Need to Know

  Balayage, ombré, highlights, sombre. The hair world loves a French word. They also love using them all interchangeably, even when they mean completely different things.  So, what is balayage? You know how, when you were younger, your hair would go lighter from being in the sun; well, balayage gives off that exact sun-kissed, natural sandy blonde looking hair colour! We cover the meaning of balayage hair, how it differs from ombré and highlights, and how to find the right shade match for your hair so you can pull off the summer look even in the dead of winter. At a Glance: Balayage is a French hair colouring technique meaning "to sweep", where colour is hand-painted onto the hair for a soft, sun-kissed finish It's not the same as ombré (which is a look, not a technique) and grows out far more naturally than traditional foil highlights Balayage extensions come pre-coloured with that same dimensional finish already built in  They're available across every extension method: clip-ins, tape-ins, wefts, nano rings, and keratin bonds Not sure which shade suits you? Superior Hair offers 45+ shades, colour matching, and in-person consultations at our Auckland salon What is the Difference Between Balayage, Ombré, and Highlights?  Balayage Balayage is a technique. Meaning “to sweep”, this French freehand colouring technique was developed in the 1970s, where colour is applied by hand rather than using the traditional foiling or cap highlighting techniques. This results in soft, multi-tonal highlights that blend naturally into your base colour. Because the colour sits away from the roots and fades gradually down the hair as it grows out, it's become a staple for anyone who wants great colour without living at the salon. Ombré ombré is a look. Coming from the French word for “shadow”, it is the process in which the hair is dyed in a gradation from dark to light. ombré results in a lighter colour transition going from the mid-shaft of your hair to the ends and with darker hair from your roots to the mid-shaft. Unlike balayage, the hair moves from one colour to another in the most even transition possible. It's bolder and more defined than balayage, and the colour shift is intentional rather than organic. This creates the final result of being a seamless blend of the highlights and your natural hair colour. Highlights Highlights are something else entirely. When you're weighing up balayage vs highlights, the application is where they differ: a stylist sections the hair, wraps those sections in foil, and saturates the full strand with colour from root to tip. The result is brighter and more uniform than either balayage or ombré, but it also shows regrowth faster and needs more regular touch-ups to stay sharp. Balayage Ombré Highlights Technique Hand-painted freehand Graduated colour blend Foil sections, root to tip Finish Soft, dimensional, natural Bold, smooth gradient Uniform, defined, bright Dark pieces at the ends? Yes, adds depth No, lighter throughout Depends on placement Regrowth visibility Low, grows out naturally Low, roots stay dark High, visible line every 6–8 weeks Maintenance Touch-up every 4–6 months Touch-up every 4–6 months Touch-up every 8–10 weeks Best for Natural, lived-in colour Bold colour transformation All-over brightness Available as extensions? Yes Yes Yes Balayage Hair Extensions: The Easiest Way to Try the Look Getting balayage colour applied at a salon takes time, money, and chemical processing on your own hair. With balayage hair extensions, the colour is pre-done and stays consistent the entire time you’re wearing them, giving you the full dimensional finish from the moment you put them in. Clip-Ins These are the natural starting point if you’ve never worn extensions before. Simply put them in and take them out without the need for adhesives. Whether you go for balayage or ombré clip-in extensions, both come pre-coloured and ready to wear straight out of the box. With proper care, a good set lasts one to two years. Tape-Ins These sit flat against the scalp and are virtually undetectable, making them a popular choice for those with fine or thin hair. A stylist applies them in rows using a medical-grade adhesive, usually taking under an hour, and they're moved up every six to eight weeks as your hair grows. Wefts These wefts of hair are sewn or bonded onto a row of small beads by a stylist. They're brilliant for adding serious volume and work especially well for thicker hair types.  Nano Rings and Tips As the most discreet semi-permanent options, individual strands are attached one by one using either a tiny metal ring (nano rings) or a keratin bond (nano tips), which means the extensions move and blend exactly like your own hair.  Nano rings and tips are the longest-wearing method and the most versatile for styling, but they do take longer to apply. Not sure which method is right for you? That's exactly what our Auckland consultations are for, or you can browse the full balayage hair extension range online and filter by method.   Reasons to get Balayage Coloured Extensions: You Get the Colour Without the Commitment Getting balayage done at a salon means toner, processing time, and a bill to match. Balayage extensions give you the same result without any of that touching your own hair. It doesn't fade or change the way chemically treated hair does. Just remember to get your extensions maintained every 6-8 weeks for the best results! They're Made for Summer  There's a reason balayage has always been the go-to look heading into the warmer months. If you're heading into spring and want your hair to reflect it, balayage will add a natural glow and lighter tone to your hair, giving off the idea that you’ve been soaking up that hot summer sun for weeks!  It Adds Serious Dimension to Curls and Waves If you are looking for a hair technique that amplifies the long, loose curl or glamorous beach look, then balayage hair colour will certainly glam up your style. With your favourite look and balayage combined, you’ll be able to see the colour variations spiralling smoothly through to the ends of your hair.  They Work With Your Natural Hair, Not Against It Balayage extensions don't need your hair to be a specific colour to blend well. Because the darker root of the extension mirrors your natural base and the lighter ends fade away from it, they integrate cleanly whether your hair is dark brown, light brown, or somewhere in between.    How to Match Balayage Extensions to Your Hair There are a few things worth knowing about before you order. Get these right and your extensions will blend like they grew out of your head. Get them wrong and you’ll definitely be able to tell. Match to Your Mid-Lengths and Ends Balayage hair colour sits away from the roots, which is why you should hold the extension against your mid-lengths and ends, not your scalp. Match to your roots and the extensions will sit too dark through the ends, causing the blend to fall apart. Consider Your Undertone A warm brunette in cool ash extensions is going to look off no matter how close the depth is. Two shades can look almost identical on a swatch and completely different once they're in your hair.  Warm hair leans golden, caramel, or honey, while cool hair leans ash, beige, or silvery. Check yours in natural light to determine your undertone.  Create a Noticeable Contrast Balayage only looks like balayage when the lighter ends are actually lighter. Aim for at least two to three shades of difference between the darker root and the lighter ends of the extension. Too close together and you lose the whole dimensional effect. Go for the Lighter of Two Shades Lighter blends more forgivingly than darker. An extension that's slightly lighter than expected will still blend, while a darker one tends to sit heavy and obvious through the ends.   Frequently Asked Questions Do balayage hair extensions work on dark hair? Yes, as long as you choose the right shade. A chocolate brown balayage extension, for example, pairs a deep brown base with lighter caramel or honey ends. The darkest tone in the extension should be close to your natural base colour, with the lighter ends sitting two to three shades above it. The contrast is what creates the balayage effect. Can I heat style balayage extensions? Yes. Our extensions are 100% human hair, so they can be curled, straightened, and blow-dried just like your own hair. Always use a heat protectant first, and keep the temperature reasonable to protect the colour. I’m a stylist. Can I stock balayage extensions through Superior Hair? Absolutely. Superior Hair supplies salons and independent stylists with trade accounts, wholesale pricing, and the option to white-label products under your own brand. With products stocked across thousands of salons worldwide and a factory-direct supply chain, get in touch with us to discuss what works for your business. Ready to Try Balayage Hair Extensions? Now you know the difference between balayage, ombré, and highlights. And more importantly, you know exactly what to look for when it comes to finding the right extensions for your hair. The rest is pretty straightforward. Superior Hair's balayage extension range comes in 45+ shades, uses 100% human hair, and ships fast across New Zealand and beyond. Whether you're after a clip-in set to try the look for summer, a semi-permanent method for something longer lasting, or a ponytail extension for a touch of flair, it's all there. Not sure where to start with shade matching? Book a consultation to come in and see us. Our Auckland salon on Symonds Street does colour consultations in person. We'll match you up properly and make sure you leave with exactly the right shade, length, and method for your hair.

Learn more