
Skip to content
BLACK FRIDAY IS HERE - UP TO 60% OFF! NO DISCOUNT STACKING. ONLINE ONLY.

How to Apply Clip-In Extensions: A Step-by-Step Placement Map

Quick answer

To apply clip in extensions, brush out tangles, then part a horizontal section at the back of your head just below the occipital bone. Lightly tease the roots, clip in the widest weft, and work upward in rows about two fingers apart. Finish with smaller wefts above each ear, keeping a cover layer of your own hair on top.

Most clip-ins that look obvious are not the wrong colour or the wrong hair. They are in the wrong place. Learning how to apply clip in extensions is really learning where each weft belongs on your head, and once you have that map memorised, a full set goes in quickly and stays hidden all day. This guide walks you through every zone, every step, and the small adjustments that change the map for fine, thick or shorter hair.

Before you start: what is in your set

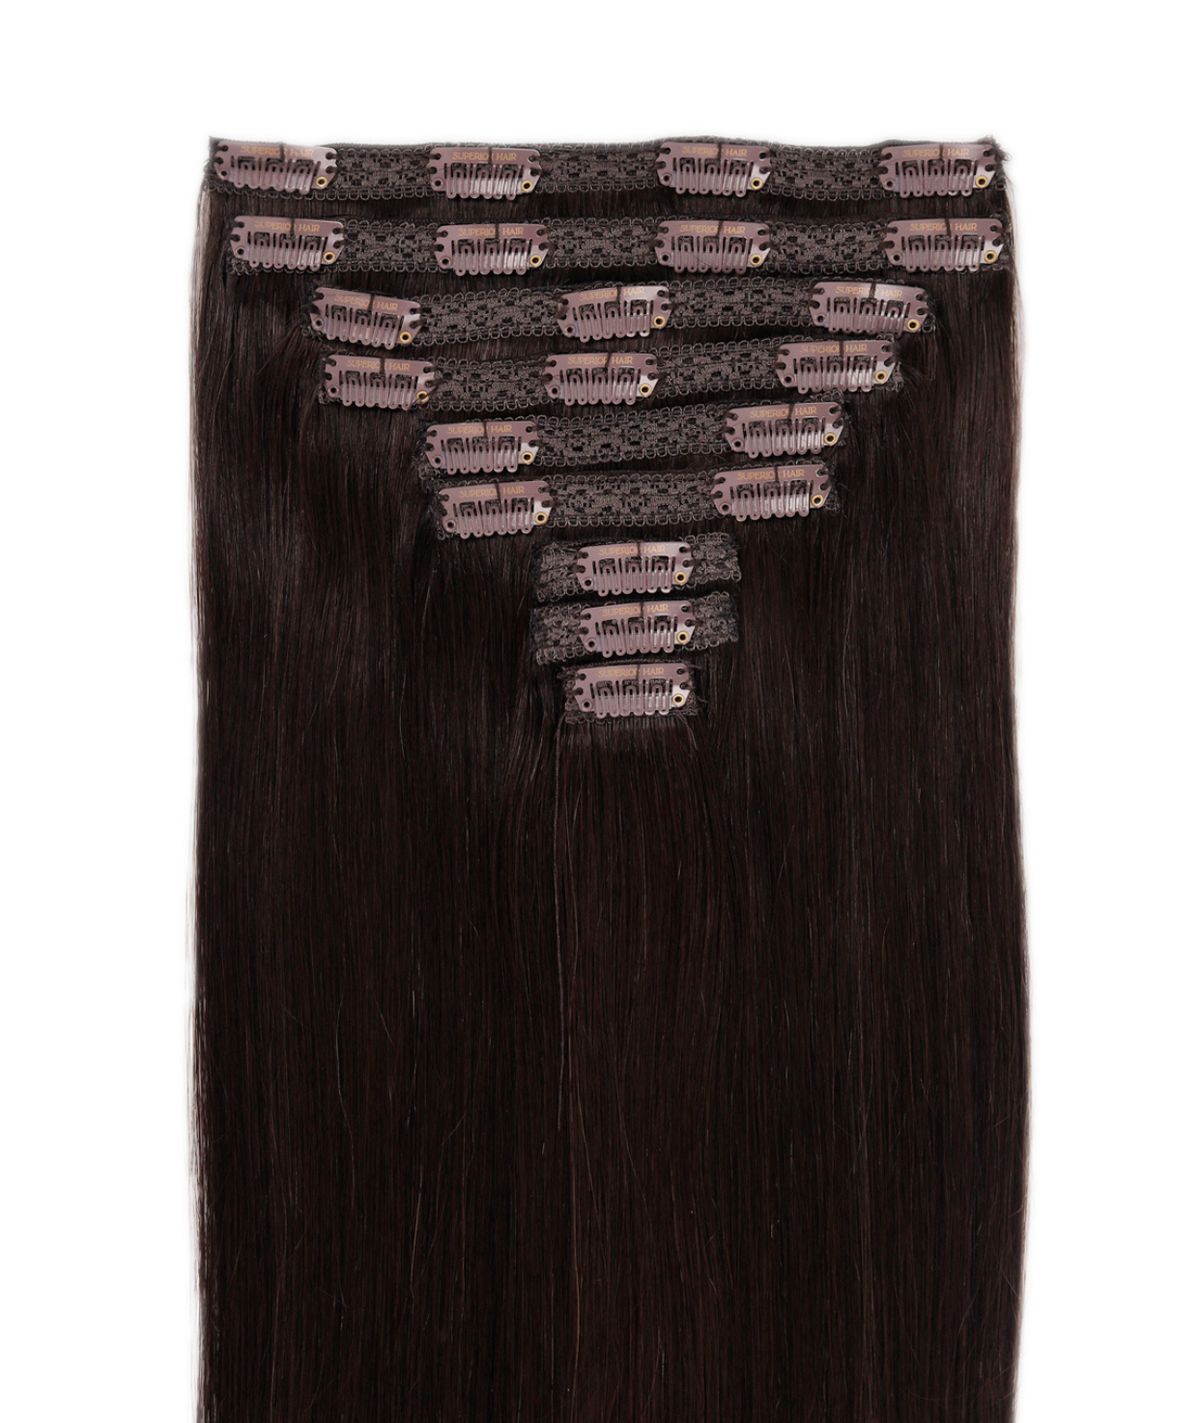
Lay every weft out on a clean towel, widest to smallest. A clip-in set is made of graduated wefts: wide pieces for the back, medium pieces above them, and small pieces for the sides and face. With Superior Hair sets, one of the small 1.5-inch wefts sits on top of the pink box for colour matching. It is part of your full set, so do not put it aside.

How many wefts you have, and how much hair is on each, decides how many rows your map can hold. Here is how the three main Superior Hair clip-in lines compare.

Set Pieces Weight range Best for How the map changes
A Grade Clip-Ins 7 80g to 100g Fine or thin hair Two back rows plus sides; the top row is often skipped
Classic Clip-Ins 9 105g (16") to 145g (26") Thin to medium hair The full map: three back rows, sides and face frame
Seamless Clip-Ins 10 160g (16") to 240g (24") Medium to thick hair The full map plus an optional nape weft; thin silicone wefts lie flatter

If you are still choosing between the two thicker options, our comparison of seamless vs classic clip-in weft construction explains how the silicone base changes the way a weft sits against your head.

New to extensions?

Clip-ins are one of several ready-to-wear options you can put in and take out at home, with no salon appointment and no bonds. See how they compare with halos, ponytails and buns before you commit.

Browse the ready-to-wear extensions range →

The clip-in placement map, zone by zone

Think of your head in horizontal bands, built from the bottom up. The widest wefts go low, where your head is widest and the most hair sits above to hide them, getting narrower as you climb and move to the sides. Leave about two finger-widths (2 to 3 cm) between rows.

Zone Where it sits Which weft Why it goes here
1. Lower back A straight line just below the occipital bone (the bump at the back of your skull), stopping 2 to 3 cm in from each ear Your widest weft The widest part of your head, with the most hair above to cover it
2. Mid back Two finger-widths above Row 1 The next widest weft Builds density through the back, where length is seen most
3. Upper back Another two finger-widths up, at least 3 cm below your crown and parting A medium weft Fills out the top layer while leaving hair to cover the clips
4. Sides Just above and slightly behind each ear, angled to follow the curve of your head A matching pair of small wefts Carries length forward so it does not stop behind your ears
5. Face frame (optional) Behind the hairline at the temple, under the top layer The smallest wefts, including the 1.5-inch Softens the line around your face and fills any gaps

The rule that overrides everything: always leave a cover layer. Your top section, from crown to parting, stays free of clips. Steal from it to fit one more piece and the whole set shows.

How to apply clip in extensions, step by step

Work in front of a mirror, with a hand mirror for the back. Your first attempt will feel slow; within a few tries the map becomes muscle memory.

1. Start with dry, detangled hair

Clips grip poorly on damp or freshly conditioned hair. Brush out every tangle from ends to roots. Second-day hair, with a little natural grip, is often easier to work with.

2. Part Row 1 and pin the rest up

Use the tail of a comb to draw a clean horizontal part just below your occipital bone. Twist everything above it up and out of the way. A few sectioning clips, like the croc clips in our extension tools and accessories, keep the line clean so stray hair does not get caught under the weft.

3. Give the roots some grip

Lightly backcomb a narrow strip along the part, right at the root, or mist it with a little dry texture spray. This gives the clip teeth something to hold and stops wefts sliding, especially on fine or silky hair.

4. Open the clips and place the weft

Snap every clip open by bending it back. Hold the widest weft with the comb teeth facing your scalp and the clips pointing down. Line it up just under the part, then slide the centre clip into the hair at the root and snap it shut. Do the outer clips next. Starting from the centre keeps the weft straight and even.

5. Tug test, then drop the next section

Give the weft a gentle pull. It should feel secure without pinching. Let down a band of hair about two finger-widths deep so it falls over Row 1, part again, and repeat steps 3 and 4 with the next widest weft. Continue up to Row 3.

6. Finish the sides and face

Section just above each ear and place a matching small weft on each side, angled slightly to follow your head. If you are using face-framing pieces, tuck them under the top layer near the temple. Check both sides in the mirror so the length looks even.

7. Let everything down and blend

Release your top layer and brush through from the ends upward with a loop brush, which glides over wefts without snagging. Then style your hair and the extensions together.

Not sure of your shade?

Perfect placement still shows if the colour is off. Send our team a photo of your hair in natural light and we will match you to the right shade before you order.

Get your free colour match

Adjusting the map for your hair type

The five-zone map is a starting point. Your density and length decide how many rows you can hide.

Fine or thin hair

You have less of your own hair to cover each weft, so use fewer, lighter pieces. A 7-piece A Grade clip-in set is built for this. Keep to Rows 1 and 2 plus the sides, spread the rows a little further apart, and always tease the root. Too many wefts on fine hair adds weight at the clip point and makes the lines easier to spot.

Medium hair

This is the hair the full map is built for. A 9-piece classic set fits all five zones, with enough of your own hair left on top to hide the upper row.

Thick or coarse hair

Thick hair can swallow a light set and leave a visible step where the extensions start. Choose more hair per weft with seamless clip-in extensions, and consider a small extra weft at the nape, below Row 1, so the density carries all the way down.

Shorter or layered hair

At shoulder length or shorter, the jump between your ends and the extensions is the challenge, not the clips. Keep the wefts slightly lower, start with a shorter length, and curl everything together. A stylist can also cut the extensions into your shape.

Unsure how many wefts or grams you actually need for your density? Our guide to how many packs of hair extensions you need breaks it down by hair type.

Blending colour, length and texture

Placement hides the clips. Blending hides the extensions. Three things matter most.

Colour. Match the extensions to the mid-lengths and ends of your hair, not your roots, because that is the part they sit against. If your hair has highlights or a grown-out root, a highlighted or balayage shade often blends better than a solid colour.

Length. A big jump in length makes your own ends look thin against the extensions. For a first set, a moderate length blends more easily than the longest option.

Texture. Superior Hair clip-ins are 100% Remy human hair and arrive smooth, so you can curl or straighten them to match your texture. Loose waves through both disguise any difference in density.

Common placement mistakes and how to fix them

  • Wefts placed too high. If clips show when the wind blows or you tuck your hair behind your ear, move Row 3 down or leave it out.
  • Clipping too close to the parting. Keep at least 3 cm of your own hair between the top weft and your part.
  • Stacking wefts directly on top of each other. Wefts closer than two finger-widths create a bulky ridge. Give each row its own band of hair.
  • Uneven sides. Use the same size weft on each side and check the length in the mirror before you style.
  • Clips that pinch or ache. The clip is gripping too little hair, or sitting on the scalp. Re-clip it a fraction further from the root with a slightly wider section.

Applied and removed properly, clip-ins are one of the gentlest methods. Long periods of root tension are the main risk, which is why they should never stay in overnight. Our honest answer on whether hair extensions damage your hair goes into more detail.

Taking them out and looking after them

Remove clip-ins in reverse order, from the face frame and sides down to Row 1. Open each clip fully before you slide it out; pulling a closed clip drags on your hair. Take them out before you sleep or swim.

Clip-ins do not get oily like your scalp, so they only need a wash every 10 to 15 wears. Use alcohol-free and sulphate-free products, never brush them wet, and do not bleach or dye them. Use heat protection, keep hot tools off the weft and clips, and store the set flat in its box, wefts in order. Cared for this way, a set can last up to a year. The full routine is in our hair extension care guide.

Ready to try the placement map yourself?

Our 9-piece classic clip-in sets are built for the full five-zone map, in 100% Remy human hair across more than 30 shades.

Shop classic clip-in extensions →

Clip-in extension FAQs

How do you apply clip in extensions for the first time?

Start with dry, brushed hair and lay your wefts out from widest to smallest. Part a horizontal section just below the bump at the back of your head, tease the roots lightly, and clip in the widest weft centre clip first. Work upward in rows about two fingers apart, then add small wefts above each ear.

Where should clip-in extensions be placed?

Place the widest weft just below the occipital bone, the next two wefts in rows about 2 to 3 cm apart above it, and small wefts above and slightly behind each ear. Keep every clip at least 3 cm below your crown and parting so your own top layer covers them.

How many clip-in wefts should I use?

It depends on your density. Fine hair usually suits a lighter 7-piece set across two back rows and the sides. Thin to medium hair suits a 9-piece set across the full map. Medium to thick hair often needs a fuller 10-piece seamless set, sometimes with an extra weft at the nape.

How do I stop my clip-in extensions from showing?

Keep the top weft at least 3 cm below your parting, leave a full cover layer of your own hair on top, and space rows about two finger-widths apart. Lightly tease the root so wefts sit flat, match the colour to your ends rather than your roots, and style both together.

Can I sleep or swim in clip-in extensions?

No. Take clip-ins out before sleeping or swimming. Overnight wear puts constant tension on your roots and tangles the wefts, while pool and sea water dry out the hair. Removing them, brushing them through and storing them flat in their box keeps both your own hair and the set in good condition.


News

5 Hairstyles with Hair Extensions for Your Special Occasion

5 Hairstyles with Hair Extensions for Your Special Occasion

When it comes to special occasions, such as a wedding, ball, birthday or glamorous party, we all want to look our absolute best. One way to elevate your look is with hair extensions! Giving you just that extra touch of elegance and allure. Hair extensions offer a world of possibilities, allowing you to experiment with length, volume, and texture. In this blog, we'll explore some stunning hair extension styles that are perfect for special occasions, ensuring you stand out and feel confident on your big day. 1. Luscious Long Waves Long, flowing waves exude femininity and grace, making them a popular choice for formal events. If your natural hair is shorter or lacks volume, hair extensions can help you achieve those dreamy cascading waves. Opt for Superior Hair Classic Clip-In Extensions. Blending in seamlessly with your natural hair, you'll be the talk of the town when it comes to serving looks. Style your hair in loose, romantic waves using a curling iron or hot rollers, and then gently brush them out for soft, luxurious waves. Achieving a timeless and glamorous look that complements any special occasion 2. Elegant Updo An updo hairstyle adds sophistication and elegance to any special occasion. And most times all it takes is a little bit of added volume to make your bun from looking 'nice' to 'STUNNING!' . You can opt for Clip-in extensions for a temporary style or invest in semi-permanent options like tape-in or Nano Bead extensions for longer-lasting results. Whether you choose a classic bun, a braided updo, or a sleek chignon, adding those extensions will have your elegance be so apparent, you'll have even Grace Kelly running for her money.  3. Braided Beauty   Braided hairstyles have gained immense popularity in recent years, and they're a fantastic choice for special occasions. Consider incorporating SHE Nano Bead Extensions with this style. They provide the necessary length, volume and versatility in movement to achieve intricate braids like fishtails, Dutch braids, or crown braids. Consider adding embellishments like jeweled hairpins or delicate flowers to elevate your braided hairstyle and make it truly unforgettable. 4. Voluminous Half-Up, Half-Down If you're looking for a hairstyle that combines the elegance of an updo with the youthful allure of loose hair, a voluminous half-up, half-down style is the way to go. Hair extensions can help create the desired volume and length for this glamorous look. Add in a SHE Halo Extensions and then tease the crown of your hair gently to add height, then gather a section of hair from each side and secure it at the back with a beautiful clip or hair accessory. Let the rest of your hair flow freely, and you'll have a hairstyle that's both sophisticated and effortlessly chic. 5. Glamorous Ponytail What's an everyday lazy hairstyle that can be red-carpet-worthy? A ponytail! With the help of the right hair extensions ofcourse. Ponytail Extension are a great way to make lazy look gorgeous. If you were going for a long sleek look opt for the SHE 26" Pony and straighten the ends. If you were after a voluminous bouncy pony OPT for the 20" Pony and slightly tease and add curls to the ends.  Now what once was your lazy hairstyle is worthy enough to be photographed by paparazzi.  Make your next special day feel that much more special, whether with luscious long waves, an elegant updo, a braided beauty, a voluminous half-up half-down, or a glamorous ponytail. Hair extensions are the perfect addition to your hair glamour needs!

Learn more
Celebrities spotted in Superior Hair

Celebrities spotted in Superior Hair

Celebrities have mastered the art of jaw dropping transformations with the help of hair extensions. From luscious, flowing locks to bold and edgy styles, these stars have embraced the versatility that hair extensions can provide. Superior Hair Extensions has been proven to be a favourite by a few of our favourite celebrities! Take a look at who they are...   Benee Spotted in the 26" Superior Tape-In Extensions in #1 Jet Black. We definitely know her strands are not a la-la-la-lonely chiccc...   Rita Ora Spotted in Superior Hair Tape-In Extensions - hair styled by - Michael Beel @michaelbeelhair. R.I.P to the girl (short hair) you used to see. Her (short hair) days are over, baby she's overrrr...   Parris Goebel Spotted in Superior Hair Lace Front Human Hair Wig in Dark Brown. From the flow of her moves to the flow of her hair, Kiwi Superstar knows how to be in perfect sync not just with her dance styles but with her hairstyles too!   Jay Ryan Spotted in Superior Hair Tape-In Extensions in the colour #2. We love when actors embrace on-screen makeovers. Here's one of our Kiwi favourites embracing his long locks for his movie role.   Larissa Trownson Spotted in Superior Hair 26" Tape-In Extensions in the colour #60. Starring in Too Hot to Handle Season 2, our kiwi bombshell definitely knows how to bring the heat!   Kris Fox Spotted in Superior Hair 22" Tape-In Extensions in multiple shades - #1B (on the left) and a mix of #6 and #8 (on the right). Our fav "all round glamazon" isn't afraid of switching her looks up. With the help of the 38+ shades available at Superior Hair, she stays serving serving looks!

Learn more
Maintaining Hair Extensions 101 with Superior Hair

Maintaining Hair Extensions 101 with Superior Hair

Are you tired of waiting for your hair to grow out or looking for a quick way to add volume and length to your locks? Hair extensions are a fantastic solution! With the ability to transform your hairstyle instantly, hair extensions have become a popular choice for many people. However, just like natural hair, hair extensions require proper care and maintenance to ensure they stay looking their best. In this blog, we will explore some essential tips for maintaining hair extensions so that you can enjoy them for a long time. Brush Your Extensions Regularly One of the most crucial steps in maintaining hair extensions is brushing them regularly. Brushing helps to prevent tangling and matting, which can cause damage to the extensions and your natural hair. Use a wide-toothed comb or a special extension brush to gently detangle the hair, starting from the ends and working your way up. Avoid harsh brushing or tugging as it can cause breakage or pulling on the bonds or wefts of the extensions. Shampoo and Condition with Care Proper shampooing and conditioning are crucial for maintaining hair extensions. Use a gentle, sulfate-free shampoo and conditioner specifically designed for hair extensions. Avoid applying conditioner directly to the roots or bonds of the extensions as it can cause slippage or loosen the bonds. Instead, focus on the mid-lengths to ends of the hair. Rinse thoroughly and gently squeeze out excess water with a towel, avoiding any rubbing or twisting motions. Be Mindful of Heat Styling While hair extensions can be styled using hot tools, it's important to be cautious with heat styling to prevent damage. Use a heat protectant spray before using any hot tools, such as flat irons, curling irons, or hair dryers. Avoid applying direct heat to the bonds or wefts of the extensions, as it can weaken the bonds and cause them to slip. Use heat on a lower setting and limit the use of hot tools as much as possible to prolong the lifespan of your extensions. Sleep with Care Sleeping with hair extensions requires some special attention. Avoid going to bed with wet hair or sleeping with your hair extensions loose. Instead, loosely braid or tie your hair in a low ponytail to prevent tangling or matting while you sleep. Consider using a silk or satin pillowcase, which can help reduce friction and minimize damage to the extensions and your natural hair. Avoid Chlorine and Saltwater Chlorine and saltwater can be harsh on hair extensions and cause damage over time. If you plan to swim or be exposed to chlorine or saltwater, consider wearing a swim cap to protect your extensions. If that's not possible, rinse your extensions with clean water immediately after swimming to remove any chlorine or saltwater residue. Follow up with a moisturizing conditioner to restore moisture and prevent dryness. Get Regular Maintenance Just like natural hair, hair extensions also require regular maintenance. Schedule regular appointments with your stylist to have your extensions checked and maintained. This can include tightening the bonds, repositioning the wefts, or replacing any damaged extensions. Regular maintenance will help prolong the lifespan of your extensions and keep them looking their best. Avoid DIY Removal When it's time to remove your extensions, it's essential to avoid DIY removal. Trying to remove the extensions yourself can cause damage to your natural hair and the extensions. Always seek professional help from a trained stylist who can safely remove the extensions without causing any harm to your hair or the extensions.   In conclusion, proper care and maintenance are essential for maintaining hair extensions and ensuring they look their best for a long time. Regular brushing, gentle shampooing and conditioning, being mindful of heat styling, sleeping with care, avoiding chlorine and saltwater, getting regular maintenance, and avoiding DIY removal are crucial to sustaining the hair of your dreams.   

Learn more
Man putting on hair toupee by himself

Washing your hair when wearing a Hair Replacement Wig

If you wear a hair replacement wig, it's important to take good care of it to keep it looking great and prolong its lifespan. One of the most important aspects of wig care is washing it. In this blog, we'll be discussing the process of how to wash your hairpiece while it's still attached to your head. Refer to the video below for a detailed explanation from one of our most loyal customer:  Step 1: Wet your hair Let the water run down the hair, until it is nice and saturated. Step 2: Shampoo Reach for a paraben and sulfate free shampoo and gently lather it through saturated hair. Massage it lightly, focusing the lathering and foaming of the shampoo on the top of the piece, rather than letting it go underneath. This can slowly breakdown the bond if it goes underneath the piece.  Step 3: Wash out Shampoo Gently run the water through hair as you rinse the shampoo out. Run your fingers through to make sure all soapy matter is gone.    Step 4: Condition Reach for a paraben and sulfate free conditioner. Lather this ONLY at the ends of the hair. Lathering this at the scalp can cause falling out of the hair to occur faster.  Step 5: Wash out conditioner Wash out the conditioner, making sure no slimy residue is left.  Step 6: Dry Gently dry out your hair with a towel first, by patting the towel onto your hair piece. Then remaining water can either be air dryed or blow dried to create a flawless styling of the hairpiece. Step 7: Oil- optional This is a highly recommended step, to prolonging your piece. Argan oil is a great option for this. Gently rub a few drops of the oil into your hands, then go ahead and run your fingers through your hairpiece. Oil helps seal moisture into your hair, allowing your hair to stay hydrated and healthy.  By following these steps, you can keep your hairpiece looking natural and healthy for a long period of time. Remember the key is to be gentle!

Learn more
Hairstylist putting hairpiece on bald man

How are our Men's Hairpieces are attached using tape

Losing hair can be frustrating for many men.Fortunately, hair replacement wigs and toupees have come a long way in recent years. They are a great option to restore your hair, especially if you want to avoid the risks that come with surgery.  In this blog we'll be going through the process of attaching a men's hair replacement piece. Refer to the video below for the detailed process captured on video:    Step 1: Hair Template  Your custom template will be used as indication for where your hairpiece will sit.  Step 2: Shave The markings you created on the head using the template, will now be used as indication on where to clean shave on the head. Step 3: Cut Cut off any extra base, if needed. Step 4: Tape Tape the hairpiece using double sided tape. Step 6: Attach The now taped hairpiece will be attached to the clean shaven area on the man's head. Step 7: Measure Hands on the forehead can be used as a guide to make sure hairpiece is not placed too far or forawrd or too far back on head.  Step 8: Place The hairpiece will then be pressed firmly on the head to make sure it is secure. Step 8: Cut and Style  The hairpiece can then be cut and styled to the man's preference. It is recommended to cut and style after hairpiece is attached rather than prior. This is to reduce any errors in the desired final look. Step 9: Smile Now there's a big grin going from left to right as you look at yourself in the mirror with your new hairdo.  Attaching a men's hair replacement wig/toupee is a fairly clean and easy process. Remember to choose a piece that matches your hair colour and type, and make sure you took good care of it. You'll be looking your most confident self !

Learn more
Choosing your perfect shade of Superior Hair Extensions

Choosing your perfect shade of Superior Hair Extensions

Superior Hair Extensions are available in 38 Shades including a range of dual tones, ombres and balayages. All our extensions are made from 100% human hair! They are dyed carefully in a way that caters to a wide range of hair colours. When you take a closer look at each strand of our extensions at Superior Hair, you may notice that the strand isn’t just made up of one flat colour but rather they are occupied with both light and dark variations to give a more natural blend, whilst adding depth and dimension. Making your new locks look real, healthy, and shiny! Need some help finding your perfect match, head over here to our colour matching page or DM us with a photo of your hair on any of our social media @superiorhairnz. Or additionally purchase our SHE Colour Ring, if you're someone that tends to switch up their hair quite abit.    Here are a few of our favourite shades blended in perfectly for reference: Shade: Dark Ash Brown Balayage  Shade: #60   Shade: #18/60   Shade: #1   Shade: Iced Coffee Balayage   Shade: Chocolate Brown Balayage

Learn more
Rihanna and Kim Kardashian in a messy bun and sleek bun look

The most perfect bun: Superior Hair Clip-In Bun!

Whether it be a messy bun or sleeked down one, there’s a bun to suit every individual. Luckily, we’ve launched a new and improved version of our previous buns, that caters to all the styles.

Learn more
Our newest addition! The famous 'GENIUS WEFT'!

Our newest addition! The famous 'GENIUS WEFT'!

Our newest addition to our Weft Collection is the “Genius Weft”. It is the most premium style of weft in the hair extension market and serves to be the most preferred choice among stylists. With traditional wefts, the seams are a lot thicker, however they able to be cut. These wefts suit those that are wanting that extra thickness. Hand-Tied Weft Extensions come much thinner, so it’s easy to blend into your hair without and lumps and bumps! However, they cannot be cut, so they if they are too long, they will need to be folded over when installing. Good thing about our new Genius wefts, they are both thin AND can be cut along the seams! Making it practically invisible! Its customization abilities are why it’s such a flexible choice. The Genius Weft uses a new method of machine weaving, which allows the hair to be tightly weaved meaning no return hair! Return hair is something that is usually present in Hand-Tied Weft Extensions. For many people return hair isn’t too much of an issue, however people with sensitive scalp can be irritated by those few strands that come apart. This new machine weaving method ensures that the above doesn’t occur. Traditional wefts come much denser, not allowing for it to be stacked on top of another seamlessly or create colour blends. Hand Tied Wefts, come less dense allowing you to layer multiple wefts and create unique blends. Genius Weft allows you to have more density than the Hand Tied all while still giving you the ability to create unique colour blends and stack multiple wefts. Coming in 30+ colours, SHE Genius Weft is ready to have our stylists on chokehold!   PLEASE NOTE: We highly recommend to not allow the use of Olaplex on the band of the extensions as the active ingredients in Olaplex can break the band.   

Learn more
Models posing with half up half down hair, in front of christmas tree

7 Different Holiday Hairstyles for 7 Different Holiday Moods

As merry as the holiday season can be, it can also be quite stressful. From gift shopping to party set up to even more shopping. The whole shazam can sometimes make you want to pull a hair or two. To make the holiday season easier for you, we’ve come up with 7 different hairstyles for you to wear, so you have one less thing to worry about. 

Learn more