
How Hair Extensions Work: A Complete Starter Guide for Beginners
Getting your first set of hair extensions can feel like a big decision, with so many types, price points, and application methods out there. At Superior Hair, we’ve spent over 20 years manufacturing and fitting 100% human hair extensions, and we talk beginners through this decision every week, both at our Auckland salon and online.
Whether you want extra length, added volume, or the freedom to try new styles, extensions are one of the easiest ways to transform your look without waiting months for growth. This guide walks you through everything you need to know about hair extensions for beginners, in a simple, step-by-step way, so that you can choose the right option with confidence.
What Are Hair Extensions? A Beginner-Friendly Explanation
When it comes to hair extensions for beginners, it’s important to understand what hair extensions are.
Hair extensions are sections of real human hair or synthetic fibres that are added to your natural hair to instantly increase length, thickness, and overall volume. They’re designed to seamlessly blend with your own hair, giving you a fuller, more polished look without waiting months for hair growth.
At Superior Hair, every extension we sell is manufactured from 100% Remy human hair at our own factory, which means it washes, styles, and colour-matches the same way your natural hair does.
People choose extensions for all sorts of reasons:
- To add instant length to shorter hair
- To create fuller, thicker-looking styles
- To enhance fine or flat hair with extra body
- To experiment with new looks without chemical processing
- To achieve glamorous styles for special events
- To boost overall confidence
For beginners, they offer a flexible, non-permanent way to change your hair while keeping your natural strands intact.
How Do Hair Extensions Work?
A common question from first-time users is: how do hair extensions work?
Hair extensions work by attaching wefts or bonds of hair sections to sections of your natural hair, close to the roots but never directly on the scalp. The method changes depending on the type of hair extension (clips, tape, wire, or bonds), but the goal is always the same: distribute the added hair evenly so it blends naturally and moves like your own.
We cover exactly how each method attaches in the breakdown of extension types below. And when colour and texture are matched correctly, extensions can become virtually undetectable.
What Are Hair Extensions Made Of?
Extensions are generally made from one of two materials:
- 100% Human Remy Hair: Real hair with the cuticle kept intact and aligned in one direction, which helps prevent tangling and matting. It can be washed, heat-styled, and coloured just like your natural hair, and it’s what we manufacture exclusively at our factory.
- Synthetic Fibres: A cheaper, man-made alternative that holds a set style well, but can’t be heat-styled and tends to look less natural over time, especially under bright light.
Superior Hair extensions are ethically sourced and factory-processed to maintain cuticle alignment, which is why they hold their shine and softness over repeated wear rather than dulling or tangling after a few washes.
Understanding the Different Types of Hair Extensions
Understanding the different types of hair extensions will help you choose the right option for your hair, lifestyle, and comfort level. Each kind varies in wear time, maintenance, and commitment.
Clip-In Hair Extensions
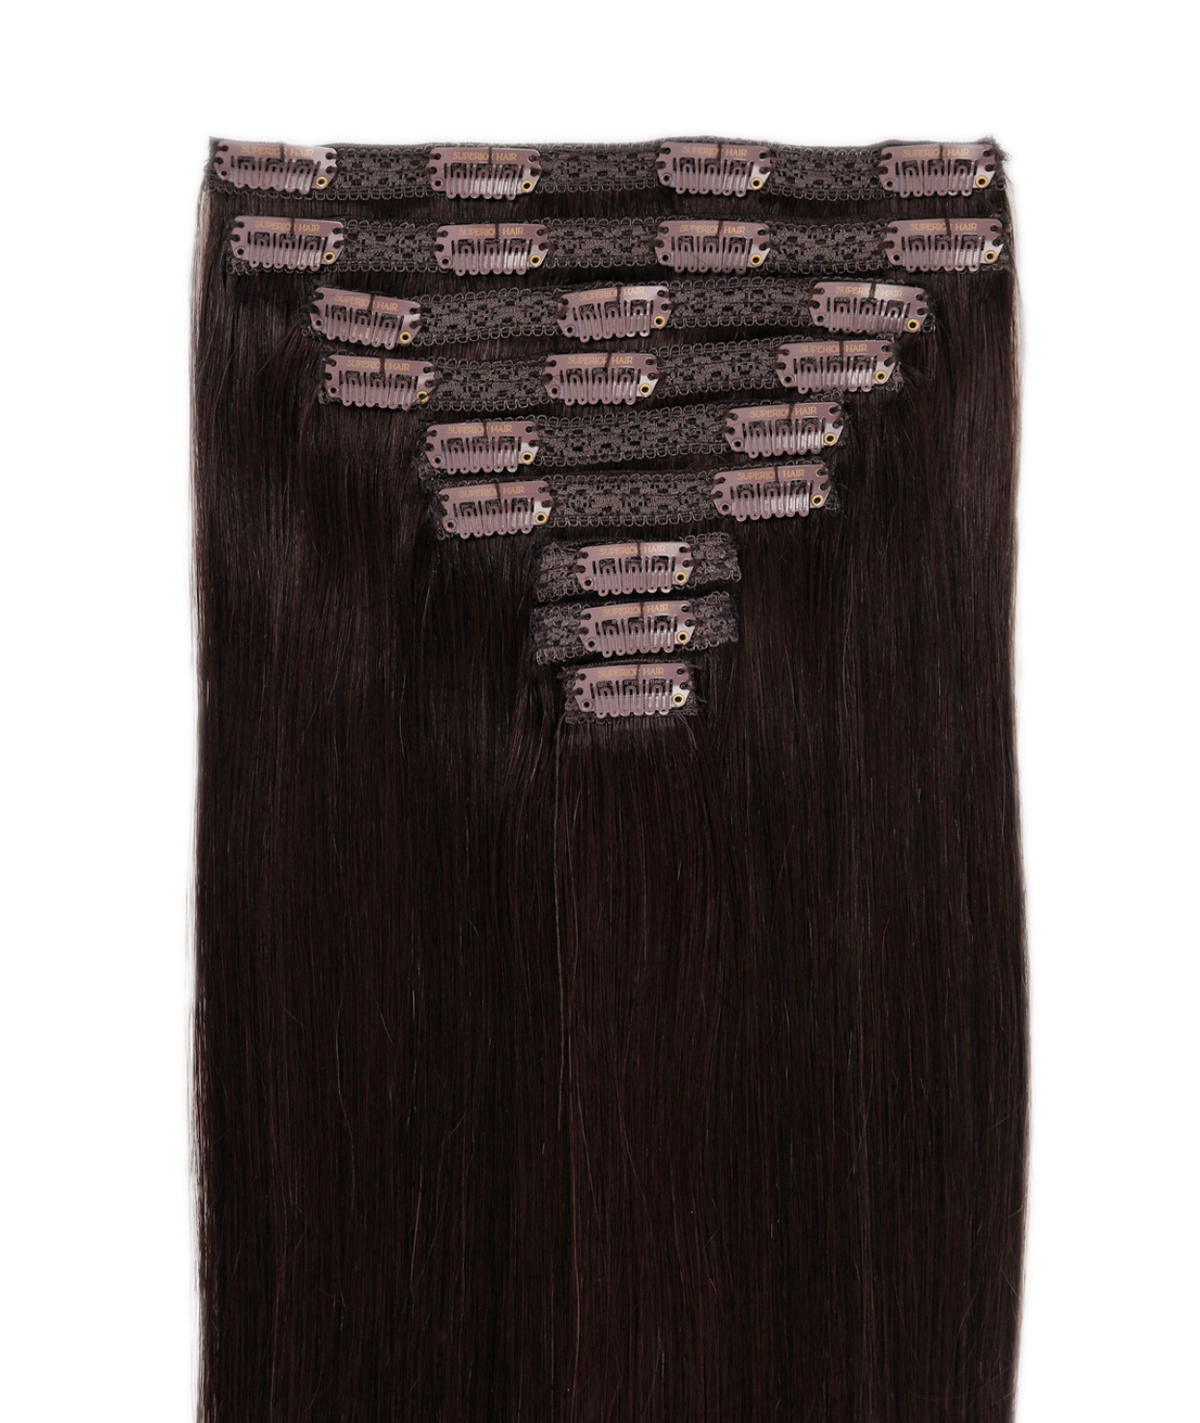
For beginners, clip-in extensions are the easiest and most flexible option. They come as wefts with small, secure clips attached, so you can apply and remove them at home within minutes. Our Classic Clip-In Hair Extensions and Seamless Clip-In Extensions are a great starting point.
| Pros | Cons |
|---|---|
|
|
Tape-In Hair Extensions
Tape-ins are one of the most popular semi-permanent options, offering a lightweight and natural-looking finish. They’re applied by sandwiching a small section of your natural hair between two adhesive wefts. At Superior Hair, we stock Ultra Seamless Tape-In Extensions and Invisi Tape Skin Weft Extensions for stunning, semi-permanent results.
| Pros | Cons |
|---|---|
|
|
Halo, Sew-In & Fusion (Keratin Bond) Extensions
These three methods suit different goals. Here’s how they compare at a glance:
| Type | Pros | Cons | Best For |
|---|---|---|---|
| Halo | No clips, glue, or tape; very quick application; gentle on natural hair | May shift during high activity; not ideal for very short hair | Ultra low maintenance, quick removal |
| Sew-In | Secure and long-lasting; suitable for thicker hair | Requires professional installation; can feel tight if installed incorrectly | Thicker hair, longer wear |
| Fusion / Keratin Bond | Very natural movement; long-lasting results | Higher investment; time-consuming installation; professional removal required | Premium, long-term wear |
Choosing the Right Colour, Texture & Material for You
Even the highest-quality extensions won’t look seamless if the shade or texture doesn’t match your natural hair.
- Match your texture: Straight hair to straight extensions, wavy to soft wave, curly to a matching curl pattern. Mismatched textures mean daily heat styling to blend, adding maintenance.
- Match mid-lengths and ends, not your roots: Most natural hair isn’t one flat shade, so look for subtle highlights and low-lights for a more realistic blend.
- Consider undertones: Warm tones suit golden, honey, or caramel shades; cool tones suit ash, beige, or icy shades.
At Superior Hair, we offer a free colour-matching service online and in our Auckland salon, so you’re not left guessing your colour match from a screen.
How to Put in Hair Extensions for Beginners: Step-by-Step
Learning the correct hair extension application technique is important for a seamless, natural result. Whether you’re using clip-ins or another temporary method, proper preparation and placement make all the difference. This guide covers clip-ins, as they’re the one method designed for you to fit yourself at home. Tape-in, sew-in, and fusion extensions should always be applied by a professional.
1. Prepare Your Hair
- Wash with a lightweight shampoo and remove any product buildup
- Dry hair completely; extensions should never be applied to damp hair
- Detangle thoroughly with a wide-tooth comb, from roots to ends
- (Optional) A small amount of dry shampoo or texturising spray can improve clip grip
2. Section & Clip
- Create a horizontal section at the nape of your neck and clip the rest out of the way
- Position the first weft close to the roots, but not directly on the scalp
- Snap clips closed, starting with the middle clip, then the sides
- Release a new section 2–3 cm higher and repeat upward, using smaller wefts near the sides of your head
- Check both sides feel balanced before moving on
3. Blend & Style
- Gently brush natural hair and extensions together, never separately
- Style both together; soft curls or waves help disguise where they meet
- Smooth flyaways with a light serum
Before you head out the door, check that no clips are visible, the hair sits securely but comfortably, the colour blends at the mid-lengths, and the hair moves naturally when you shake it out.
Hair Extension Tips for Beginners
Proper care keeps your extensions soft and natural-looking for months, while protecting your own hair underneath.
Washing & Drying
Unlike natural hair, extensions don’t receive oils from your scalp, so overwashing can dry them out.
- Clip-ins: Wash every 10–20 wears, or when product buildup occurs
- Semi-permanent: Wash 1–2 times per week with sulphate-free shampoo
- Use lukewarm water, condition mid-lengths and ends only, and avoid conditioner near bonds, clips, or tape
- Pat dry with a microfibre towel, air-dry whenever possible, always use heat protectant before styling, and use low to medium heat if blow-drying
Brushing
Gentle detangling prevents shedding, breakage, and matting.
- Use a loop brush or wide-tooth comb, starting at the ends and working up
- Hold the weft or bond area to avoid pulling while you brush
- Brush 2–3 times daily, and never brush extensions while they’re soaking wet
Sleeping & Storage
Nighttime care significantly affects how long your extensions last.
- Clip-ins: Always remove before bed and store flat or in a silk/satin bag
- Semi-permanent: Brush thoroughly before bed, tie hair in a loose braid or low ponytail, and use a silk or satin pillowcase
Long-Term Care Tips
- Minimise excessive heat styling
- Use lightweight oils only on mid-lengths and ends
- Schedule maintenance appointments if required
- Avoid chlorine and saltwater exposure when possible
The most common mistake we see beginners make isn’t a bad product; it’s overuse and poor placement. Wearing clip-ins daily without giving your roots a rest, clipping too close to the hairline, or skipping regular brushing are the three fastest ways to shorten the life of your set, and they’re all avoidable by following the hair extension tips above.
What to Know About Hair Extensions Before You Buy
Understanding what to know about hair extensions before you invest will help you choose the right set and get the most natural, long-lasting results.
- Damage usually comes from application or overuse, not the extensions themselves. Correctly fitted, well-maintained extensions shouldn’t harm healthy hair.
- They’re not just for long hair. Extensions can add shape and volume to short or medium lengths too.
- Quality outlasts price. Higher-grade human hair tangles less, sheds less, and blends more naturally than budget synthetic alternatives, which usually need replacing much sooner.
Low commitment suits clip-ins or halo extensions. Medium commitment suits tape-ins. Long-term wear suits fusion or sew-ins. If you’re not sure where you fall, start temporary and work up—it’s the lowest-risk way to learn what suits your hair and routine.
Common Questions from Hair Extension Beginners
Is hair extension application safe for beginners?
Yes. High-quality hair extensions for beginners are generally very safe when applied and cared for correctly. Temporary options like clip-ins are especially beginner-friendly, since they involve no glue, heat, or long-term commitment. Most issues come from incorrect application or poor maintenance, not the extensions themselves.
How long do hair extensions last?
It depends on the type and how well they’re maintained:
- Clip-in and halo extensions can last 6–12 months or longer with proper care
- Tape-ins typically need repositioning every 6–8 weeks
- Fusion or sew-ins can last 2–4 months with professional maintenance
Human hair extensions consistently outlast synthetic options as the hair itself can be washed and heat-styled without breaking down.
Can I sleep or shower with hair extensions in?
It depends on the type of hair extension. Clip-in and halo extensions should be removed before sleeping and showering. Semi-permanent extensions (tape-in, fusion, sew-in) can stay in for both, but should be brushed before bed and tied in a loose braid or ponytail to avoid tangling.
How do I choose the right type of hair extensions?
Weigh up your commitment level, daily routine, and hair texture. For most people starting out, clip-ins are the safest and most flexible choice while you learn what suits you. If you’d rather skip the trial and error, our team can talk you through it directly.
How do I remove hair extensions safely?
Safe removal protects both your extensions and your natural hair.
Clip-in hair extensions:
- Locate each clip
- Snap clips open gently
- Remove from bottom sections first
- Brush and store properly
Tape-in extensions:
- Use a professional adhesive remover
- Never pull or force them out
- Visit a stylist if unsure
Professional removal is strongly recommended for fusion or sew-in extensions.
Ready to Start Your Hair Extension Journey?
Superior Hair has manufactured and fitted 100% human hair extensions for over 20 years. If you’re just starting your extension journey, browse our clip-in range for the easiest low-commitment option, or shop the full collection to compare tape-ins, halos, and fusion extensions side by side.
Not sure where to start? Book a free in-store consultation, and we’ll talk you through it.