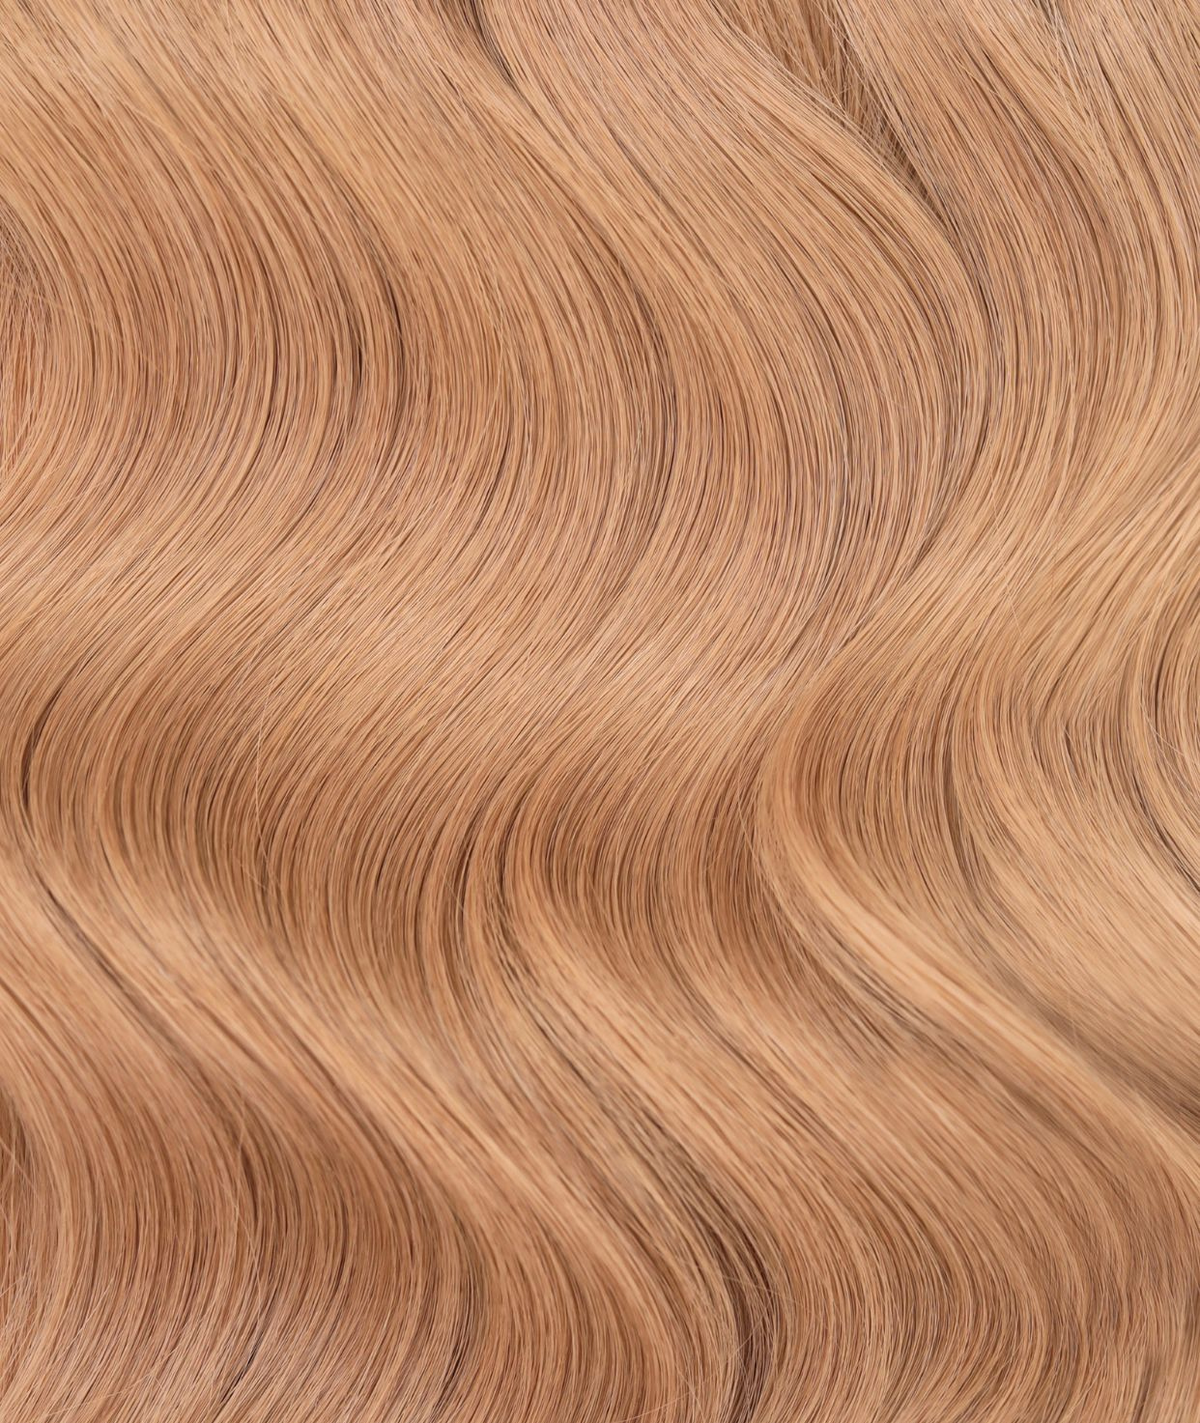
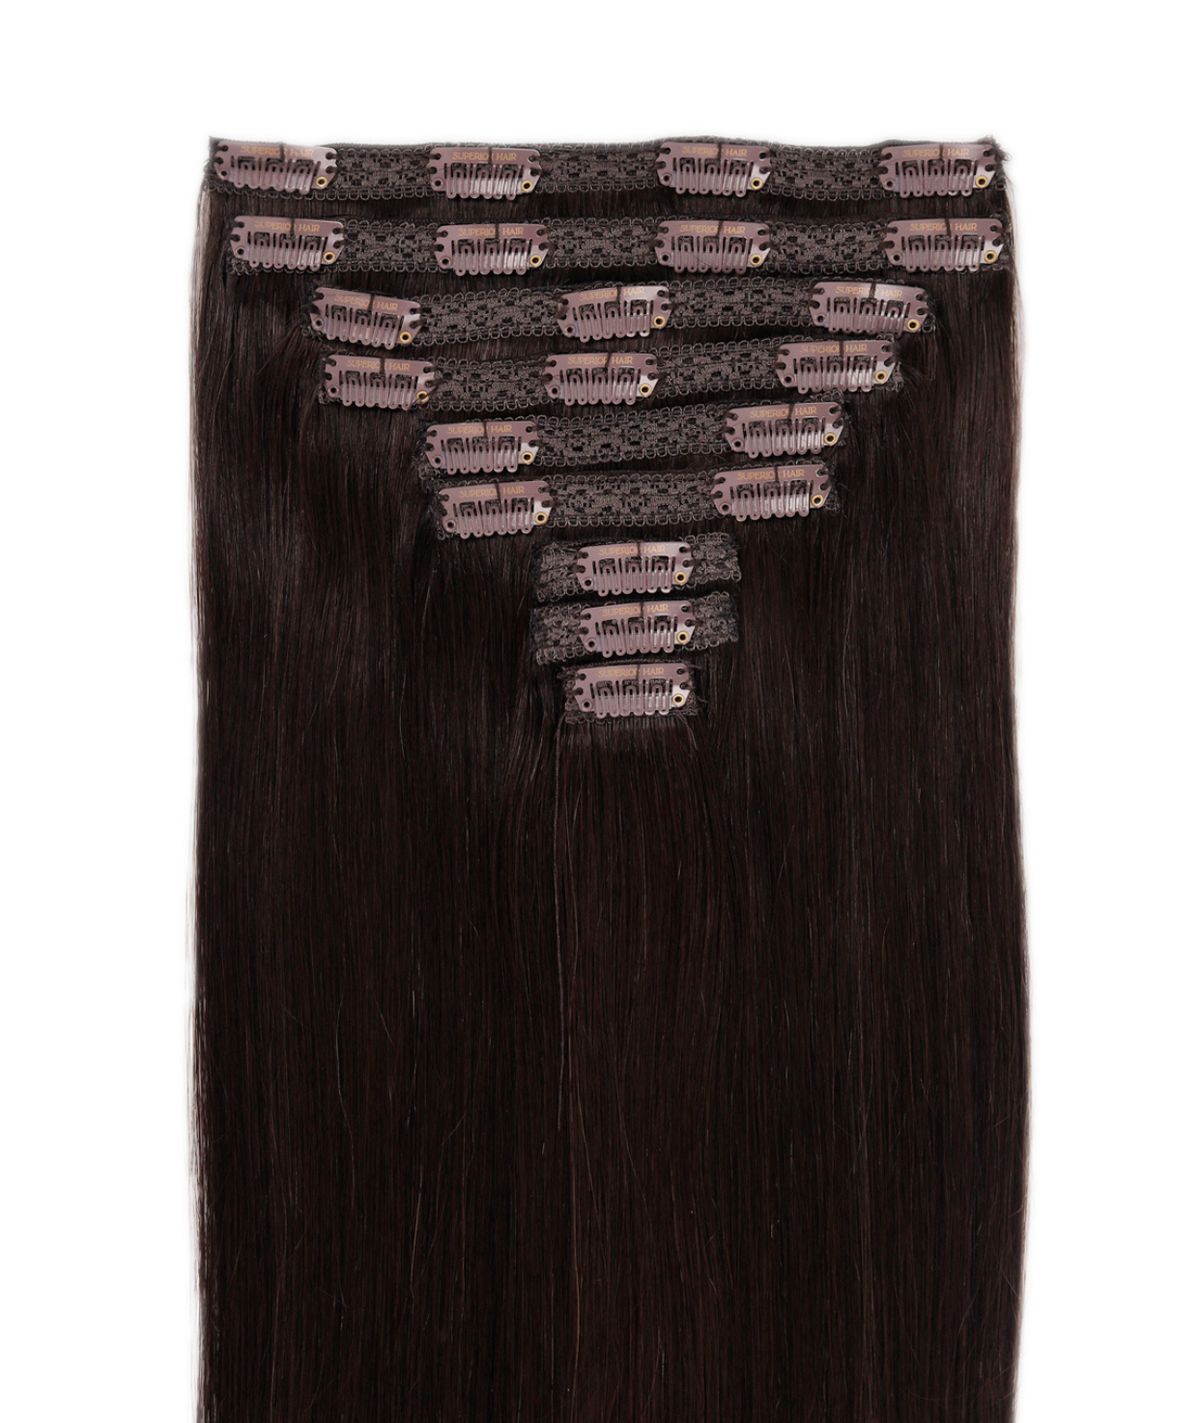
It is important that you take care of your hair extensions and wigs on a regular basis. While hair extensions and wigs made out of real human hair are easy to style and maintain, they require a certain level of care to lessen the growth of bacteria or fungus, prevent the build-up of dandruff and minimize any other negative effect it might have on your scalp.
Below are some simple yet effective ways for you to take care of your hair extension and wig.
1. Wash your Hair Extensions and wigs regularly:
Everyday your hair extensions and wigs are exposed to a variety of elements as you go about your daily activities. To lessen or prevent the build-up of dirt or debris you need to practice proper hair care. You need to wash your hair extension every 2 to 3 days if they are permanently or semi-permanently attached to your head. If they are clipped in temporarily, then you need to wash your hair 1 to 2 times per month. Additionally, you have to use the right hair care products and routine to prevent damage. This way, your hair will remain in good condition, look great and last longer.
2. Pack your hair before sleeping, exercising or swimming:
It is extremely important that you pack your hair properly before sleeping, exercising or swimming. Your hair can tangle and form tight knots that are difficult to loosen during these activities. This can lead to hair damage and breakage as you try to fix the problem. Simply brushing your hair before braiding or making a ponytail will keep your hair in place & prevent any surprises. Remember, to dry your hair properly before you brush, style and braid your hair. This will not only protect your hair but make things easier and leave you with a sleek looking hair extension.
3. Avoid Excess Heat:
Constant use of heated tools such as a hot roller or iron can damage the bonds or clips of your synthetic hair. To prevent hair damage and breakage, be sure to use a heat protection spray or allow your hair to air dry. Be sure to use your heating tools at the appropriate heating temperature to straighten your hair and limit any side effects whatsoever.
4. Use a conditioner regularly:
Your hair extensions and wigs do not benefit from the moisturizing and protective benefits of the natural oils (sebum) your scalp produces. To prevent dryness you have to regularly apply restorative conditioner to your hair extensions and wigs, at least two to three times before shampooing.
5. Avoid Chemicals in your Hair Products:
The content of your hair care products also matters a lot. Chemicals like sulphates and parabens can strip your hair extensions and wigs from its oil, moisture and infiltrate your body. Hair Care Products that are sulphate, paraben and sodium chloride-free will leave your hair extensions in perfect condition while protecting you from any harmful side effects.
Nano Tip vs Micro Ring vs Keratin Bond: Bonded Methods Compared
Quick answer
In the nano tip vs micro ring comparison, both clamp a bead around your own hair, but a nano bead measures 3.0mm against a micro bead's 5.0mm, so it sits flatter and hides better. Keratin bonds skip beads entirely and use heat-melted glue. Nano tips and micro rings are reusable. Keratin bonds are not.
You want length that stays in, not something you clip in every morning. Fair enough. The harder part is that three bonded methods sit in front of you and the names tell you almost nothing about how they will feel on your head in six weeks. It comes down to three things: what holds the hair on, how often you go back to the salon, and whether you get to keep the hair afterwards.
In this guide
What "bonded" actually means
Nano tip extensions
Micro ring extensions
Keratin bond and hot fusion U-tips
Nano tip vs micro ring vs keratin bond at a glance
Which method suits your hair and your budget
Colour matching and aftercare
Frequently asked questions
What "bonded" actually means
Bonded methods, also called strand-by-strand or semi-permanent, attach small individual pieces of hair to small sections of your own. A full head is not one big piece. It is somewhere between 100 and 200 separate attachments, placed row by row from the nape up.
Where they split is the bond itself. Nano tips and micro rings are mechanical: a small metal ring is squeezed shut around your hair and the extension tip together. Keratin bonds are thermal: a keratin tip is melted around your hair and left to harden. No heat touches your hair in a bead install. No metal stays in your hair in a keratin install.
All three are professional-install methods. None of them are a home job, and any guide that tells you otherwise is setting you up for traction damage at the root. If you are weighing these up for the first time, our beginner's guide to pre-bonded extensions covers the groundwork before you book.
New to semi-permanent hair?
Every bonded method we stock sits in one place, from nano tips and U-tips through to genius wefts, all in 100% Remy human hair.
Browse our semi-permanent extension range →
Nano tip extensions
A nano tip is a strand of hair finished with a tiny metal tip. Your stylist threads a small section of your hair through a bead using a loop needle, slides the nano tip in alongside it, and clamps the bead shut with pliers. That is the whole bond. No glue, no heat, no chemicals.
The reason people keep choosing this one is size. Our silicone-lined nano beads measure 3.0 x 1.5 x 2.0mm, which makes them roughly 90% smaller than standard ring systems. On fine hair that difference is the difference between a bond you can feel through your ponytail and one you cannot. The silicone lining inside grips without gouging, so the bead holds its position instead of sliding down the hair shaft over the first fortnight.
Our nano tip packs come in 25 strands. At 14 inches that is 20g per pack, about 0.8g per strand. At 18 and 22 inches it is 25g per pack, roughly 1g per strand. A full head is usually several packs, and your stylist works the count out from your density. Install takes around one to three hours.
Longevity and reuse
With proper care, nano tips hold for six to ten weeks before they need repositioning, and in-salon maintenance is recommended every five to eight weeks. Because nothing is melted or glued, the hair comes off intact. Looked after well, a set can be reused up to three times, which changes the maths on cost considerably. For a closer look at the method on its own, read our introduction to nano tip extensions.
Micro ring extensions
Micro rings, also called micro beads or micro links, work on exactly the same principle. Hair through the bead, extension tip in beside it, clamp shut. The method came first, and nano tips are essentially its refinement.
The working difference is the hardware. Our micro beads with silicone lining measure 5.0 x 3.0 x 3.0mm, noticeably chunkier than a nano bead. That bulk is not automatically a flaw. A bigger bead takes a thicker section of hair, which means fewer attachments across the head and a faster install. Micro beads are also used to attach I-tip strands and to sew or bead in wefts, so they turn up in a much wider range of installs than nano beads do.
What you trade is discretion. On thick, coarse hair a 5mm bead disappears under the sections above it. On fine or fair hair, or on anyone who wears a high ponytail most days, those beads are easier to spot and easier to feel when you sleep. That is the honest reason nano tips have taken over so much of this category.
Keratin bond and hot fusion U-tips
Keratin bond is the method most people picture when they hear "permanent extensions". The strand comes pre-tipped with keratin, shaped into a U or a flat tip, and your stylist melts it around a section of your hair with a hot fusion tool. As it cools it hardens into a small bond that moves with your hair and lies completely flat.
Our hot fusion U-tip extensions come 25 strands to a pack at 1g per strand, so 25g total, in 18 and 22 inch lengths. Installation is the longest of the three at two to four hours, because each bond has to be melted, rolled and set individually.
The payoff is staying power. A keratin set can last up to three months before it needs redoing, which is the longest run of any bonded method we sell. The bonds are small, flexible and genuinely hard to find by touch.
The catch is worth stating plainly. Keratin bonds are not reusable. Once removed, that set is finished, so the hair cost resets every time. Removal uses a solvent to break the bond down, and it is possible for hair to experience minor damage through that process. That is not a reason to write the method off. It is a reason to go to someone who removes bonds properly, and to be realistic that you are buying fresh hair each round.
Still torn between methods?
A virtual consultation puts your hair in front of someone who fits this every day. Density, texture, root colour and how you actually wear your hair all change the answer.
Book a virtual consultation
Nano tip vs micro ring vs keratin bond at a glance
Nano tip
Micro ring
Keratin bond
How it attaches
Clamped bead, no heat
Clamped bead, no heat
Keratin melted with a fusion tool
Bond size
3.0 x 1.5 x 2.0mm bead
5.0 x 3.0 x 3.0mm bead
Small flat keratin tip
Install time
1 to 3 hours
Generally quicker, larger sections
2 to 4 hours
Move-up interval
6 to 10 weeks
Similar, bead-dependent
Up to 3 months
Reusable
Yes, up to three times
Yes
No
Best for
Fine to medium hair, ponytail wearers
Thick, dense or coarse hair
Anyone wanting the longest wear between appointments
Which method suits your hair and your budget
Start with density, not with preference. Fine hair cannot carry a heavy bond or a heavy section, because the weight pulls at the root and the follicle takes the strain. On fine hair, nano tips win on size, on weight per strand at 14 inches, and on how little of your own hair each bond needs to hold.
If your hair is thick, coarse or very dense, the calculation flips. You have enough hair to hide a 5mm bead without effort, and micro rings let a stylist cover a big head of hair in fewer attachments and less chair time. Keratin bonds also sit well on thicker hair, and the longer wear suits anyone who cannot get back to the salon every two months.
Then think about cost over a year rather than cost on the day. A bead method is usually more appointments but the same hair. A keratin set is fewer appointments but new hair every time. If you wear extensions continuously, that reusability is the single biggest variable in what you spend, and it is the reason a lot of long-term wearers end up on nano tips even when a keratin set looked cheaper up front.
One honest note. If your hair is shedding, fragile, or recovering from bleach, none of these three is the right starting point. Bonded methods put steady tension on the root, and hair that is already struggling will not thank you for it. Ask your stylist about clip-ins or a topper while it recovers, and come back to a bonded set later.
Colour matching and aftercare
Bonded methods are unforgiving on colour in a way clip-ins are not, because the bonds sit high on the head and stay visible in a parting for weeks. Two things matter. Match the hair to your mid-lengths and ends rather than to your roots, since that is where the extension actually blends. Then match the bead to your root, which is a separate decision and the one people forget. Our nano tip colour guide shows the full shade range in natural light, which is more useful than a screen swatch.
If your natural root is much darker than your lengths, ask your stylist about a root shadow or a blend of two shades through the install. A single flat shade against a shadowed root is the most common reason a good set of extensions reads as fake.
Aftercare that applies to all three
The care rules barely change between methods, and they are not optional. Wash two to three times a week, not daily. Use a sulphate-free shampoo and alcohol-free styling products. Keep conditioner off the root area, because conditioner at the bond is what loosens beads and softens keratin. Never brush wet hair, and never use anything containing coconut oil near the bonds.
Always use heat protectant before styling. Avoid swimming where you can, and rinse with fresh water when you cannot. Do not bleach or lighten the hair yourself. With a keratin set, wait a full 24 hours after application before the first wash so the bonds cure. Our hair care guide has the full routine, including how to sleep in a bonded set without waking up to matting at the nape.
Ready for the smallest bond on the market?
100% Remy human hair nano tips, 25 strands per pack, in 14, 18 and 22 inch lengths across our full shade range.
Shop nano tip extensions →
Frequently asked questions
What is the difference between nano tip and micro ring extensions?
Both clamp a silicone-lined bead around your own hair and the extension tip together, with no heat or glue. The difference is size. A nano bead measures 3.0 x 1.5 x 2.0mm, while a micro bead measures 5.0 x 3.0 x 3.0mm. Nano tips are far less detectable on fine hair. Micro rings take thicker sections, so installs are quicker on dense hair.
Which bonded method lasts the longest?
Keratin bond U-tips last the longest, up to three months before they need redoing, compared with six to ten weeks for nano tips. The trade-off is that keratin bonds are not reusable, so you buy new hair each time. Bead methods need more frequent move-ups but the same hair can be reinstalled, which usually costs less across a year.
Can I install nano tip or micro ring extensions myself?
No. All three bonded methods are professional-install only. Sectioning, tension and bead placement all have to be correct, and a bond clamped too tight or too close to the scalp causes traction damage at the follicle. Book with a trained extension stylist. If you want something you can fit yourself at home, clip-ins or a halo are the methods designed for that.
Do nano tip or micro ring extensions damage your hair?
Neither uses heat or adhesive, and silicone-lined beads are designed to grip without cutting into the hair shaft. The risk with any bonded method is tension, not the bond itself. Bonds placed too tightly, left in past the move-up window, or removed carelessly will stress the root. Keep to your maintenance interval and use a stylist who removes beads properly.
How many strands do I need for a full head?
It depends entirely on your density and the length you are going for, so your stylist works it out at consultation rather than from a fixed number. Our nano tip and U-tip packs both contain 25 strands, and a full head is typically several packs. Thicker natural hair needs more strands to blend, not fewer.
Can I colour or bleach bonded extensions?
Do not bleach or lighten them. Remy human hair has already been processed to reach its shade, and lightening strips the cuticle that keeps it smooth. If you want a different tone, have a stylist toner or glaze it, and always order your base shade to match your mid-lengths rather than planning to lift it later.
Tape-In vs Weft Extensions: Cost, Comfort and Wear Time Compared
Quick answer
Choosing tape in vs weft extensions comes down to your hair density and how often you can get to the salon. Tape-ins sandwich your hair between two thin adhesive panels and suit fine to medium hair. Wefts are beaded or sewn along a row, carry more weight, and suit thicker hair wanting real volume.
Two clients can sit in the same chair, ask for the same look, and need completely different methods to get there. The difference is usually density at the root, not length at the ends. This guide covers what each method does to your hair, how they feel to live in, how long a set lasts, and what each costs across a year rather than on the day.
In this guide
Tape in vs weft extensions: the short version
How tape-in extensions attach
How weft extensions attach
Comfort: weight, tension and what you feel at the root
Wear time, move-ups and how long the hair itself lasts
Cost over a year, not cost on the day
Which method suits your hair
Frequently asked questions
New to semi-permanent hair?
Tape-ins and wefts both sit on the professional side of the range, applied by a stylist and worn for months. Seeing the full method list side by side is the fastest way to work out where you fit.
Browse the semi-permanent professional range →
Tape in vs weft extensions: the short version
Both methods are semi-permanent. Both are installed by a trained stylist, stay in through washing and sleeping, and get moved up as your hair grows. Neither is a home job, and any guide telling you to fit your own is setting you up for slippage and breakage.
Where they split is the attachment. A tape-in is a small pre-taped panel of hair, typically around 4cm wide, applied in pairs so your own hair sits in the middle. A weft is a continuous strip attached along a row, either beaded onto sections or sewn onto a beaded track. That one structural difference drives everything else: weight distribution, appointment length, move-up interval, and total spend across a year.
Tape-ins
Wefts
Attachment
Adhesive panels sandwiching your hair
Beaded or sewn along a horizontal row
Best for
Fine to medium hair, subtle blending
Medium to thick hair, heavier volume
Move-up interval
Roughly every 6 to 8 weeks
Roughly every 8 to 10 weeks
Appointment length
Shorter to apply, adhesive removal adds time
Longer to install, faster to take down
Flat at the root
Very flat, near invisible in a ponytail
Flat with genius and butterfly wefts, bulkier with traditional
Reusable
Yes, once re-taped
Yes, refitted with new beads or thread
How tape-in extensions attach
Your stylist takes a fine horizontal section, places one taped panel underneath, lays your own hair across the adhesive, then presses a second panel on top. Heat or a clamp sets the bond. Rows are built up the head, away from the hairline so nothing shows when your hair is up.
Because the bond is a flat panel rather than a knot or bead, the join sits almost flush with the scalp. That is why tape-ins are the go-to for fine hair: nothing to feel through a thin section, nothing to see through a light density. Superior Hair's ultra seamless tape-in range uses a thinner, more flexible panel again, keeping the transition soft where your hair is finest. The invisi tape skin weft line goes further, with a clear base that disappears against the scalp under parting.
The trade-off is chemistry. Adhesive does not love oil, silicone or heavy conditioner near the root, and it softens under prolonged heat. So: sulphate-free washing, conditioner from mid-length down only, no straightener passing over the bond.
How weft extensions attach
A weft has no adhesive at all. Your stylist builds a track across the head, usually micro beads clamped onto small sections of your own hair, then attaches the weft strip to it. Traditional wefts are sewn on with needle and thread. Newer flat wefts bead directly through the top edge, which is faster and sits closer to the head.
Superior Hair carries three weft styles and they behave differently in the hand. Genius wefts have no return hair and no thick seam, so they cut to any width without unravelling and lie remarkably flat. Invisi butterfly wefts are thinner again through the seam. Traditional wefts are the sturdiest and most forgiving on very thick hair, with a machine-sewn seam that holds shape through repeated refits.
Because a weft spreads its weight along an entire row rather than concentrating it on individual sections, one well-placed row carries a lot of hair without any single point taking the strain. That is the case for wefts on thick or coarse hair, where tape-ins would need a very high panel count to keep up.
Before you pick a method
Method matters less than shade. A perfect tape-in application in the wrong tone reads as extensions instantly, while a well-matched weft disappears. Get your colour confirmed first, then choose the attachment.
Get your colour matched
Comfort: weight, tension and what you feel at the root
Comfort is what most people actually mean when they ask which method is better. It comes down to two things: how much weight hangs off each section of your own hair, and how much you feel the attachment when you lie down.
Tape-ins
The panel is flat and soft, so there is little to feel, and most clients stop noticing them within a day or two. The risk is not the bond, it is overloading: too much hair on too little natural density puts steady downward tension on fine sections, and that is where traction damage starts. A good stylist caps the panel count rather than giving you every gram you ask for.
Wefts
Beads are harder than adhesive, and you feel a row of them for the first few nights, particularly if you sleep on your back. Genius wefts and the invisi butterfly weft range reduce this because the seam is slimmer. The bigger factor is bead tension: clamped too tight and you get a pulling sensation across the track, clamped correctly and the row moves freely with your scalp.
Neither method should hurt. Persistent soreness, tenderness at one point, or shedding at a bond means the application is too heavy or too tight, and needs adjusting at your next appointment rather than waiting out.
Wear time, move-ups and how long the hair itself lasts
Two separate timelines get mixed up constantly. The move-up interval is how long before the attachment has grown too far down the shaft and needs resetting. The lifespan of the hair is how many of those cycles you get before the set is spent.
Tape-ins generally need moving up every 6 to 8 weeks. Wefts stretch further, typically 8 to 10 weeks, because a beaded track tolerates more growth before it becomes visible or starts to swing. Faster-growing hair sits at the short end of both ranges. Our guide to how long tape-in extensions last goes deeper into what shortens that window.
The hair itself is where quality shows. Superior Hair uses 100% Remy human hair with the cuticle intact and running in one direction, which is why a set can be washed, heat styled and refitted repeatedly without matting at the ends. Non-Remy hair has its cuticles stripped or mixed in direction, and it tangles from the first month on. You can read how the hair is selected on the our hair page.
With good aftercare, both methods reuse the same hair across multiple move-ups: tape-ins are re-taped, wefts get new beads or thread. What ends a set is almost always the condition of the ends, not the attachment. Heat above 180C, sulphate shampoos and brushing from the root down age a set fastest.
Cost over a year, not cost on the day
Comparing the price of a tape-in set against a weft set tells you little, because the two methods spend money on different things. Work it out across twelve months instead.
The hair. Priced by weight and length in both cases. Longer lengths cost more because the donor hair is rarer, worth checking against the hair length guide before you commit to a length you do not need.
The application. Charged by your stylist, usually by time. Wefts take longer to install because the track has to be built. Tape-ins are quicker to apply, but the removal step at every move-up adds that time back, so across a year the labour difference narrows.
The move-up frequency. The component people underestimate. A 6 week tape-in cycle is roughly eight or nine appointments a year. A 10 week weft cycle is closer to five. Even with a longer appointment each time, fewer visits usually wins on total salon time.
The consumables. Replacement tape at each tape-in refit, replacement beads or thread at each weft refit.
There is a grade decision underneath all of it. Superior Hair runs premium lines alongside value-grade options in the same methods, which shortens a set's practical lifespan but lowers the entry point. If you are trialling extensions and not certain you will maintain them, a value grade is a reasonable way to find out first. Work the numbers through with your stylist rather than a headline price, because your density changes how many panels or rows you need.
Which method suits your hair
Choose tape-ins if your hair is fine to medium, you want length and subtle thickness rather than dramatic volume, you wear your hair up often and need the flattest join, or you are new to semi-permanent extensions and want something quick to remove if you change your mind.
Choose wefts if your hair is medium to thick, you want genuine density rather than length alone, you would rather sit for one longer appointment less often, or you have found tape-ins slipping because your scalp runs oily.
Consider something else if you are dealing with thinning through the crown or a widening part. Neither method adds coverage where there is limited hair to attach to, and adding weight to compromised sections makes things worse. A topper covers that area without loading the surrounding hair. If your shedding is sudden, patchy or new, see a doctor before a stylist: coverage is cosmetic, not a treatment.
Plenty of clients end up running both: a row of wefts through the back for weight, tape-ins around the sides where the hair is finer, blended so the join never shows. Our overview of the professional installation methods shows how the lines are typically combined.
Ready to book your application?
Tape-ins and wefts are both stylist-applied, and the right call depends on what your hair can carry. Book an installation and have the method chosen for you in the chair.
Book a hair extension installation →
Frequently asked questions
Which is less damaging, tape-ins or wefts?
Neither is inherently more damaging. Damage comes from weight and tension, not from adhesive or beads. Tape-ins overloaded onto fine hair cause traction at the panel, and beads clamped too tightly cause it at the track. Applied within your hair's capacity by a trained stylist and moved up on schedule, both methods are equally safe to wear long term.
Can I fit tape in vs weft extensions myself at home?
No. Both are professional application methods. Sectioning, panel placement, bead tension and weight distribution all need trained hands, and mistakes show up as slippage, visible bonds or breakage weeks later. If you want extensions you can fit yourself, clip-ins or a halo are the correct choice and need no appointment at all.
How often do wefts need to be moved up compared to tape-ins?
Tape-ins generally need a move-up every 6 to 8 weeks, wefts every 8 to 10 weeks. The difference is that a beaded track stays discreet for longer as your hair grows, while a tape panel starts to lift and become visible sooner. Fast-growing hair sits at the shorter end of both intervals.
Can the same hair be reused at each move-up?
Yes, with both methods. Tape-ins are removed, cleaned and re-taped with fresh adhesive strips. Wefts are unclamped or unpicked and refitted with new beads or thread. Because Superior Hair uses 100% Remy hair with aligned cuticles, a well-cared-for set survives several cycles. What usually ends a set is dryness through the ends rather than any failure of the attachment.
Are wefts too heavy for fine hair?
Traditional wefts often are, because the seam adds bulk and the row needs enough natural hair to anchor to. Genius and butterfly wefts change that calculation, since the seam is much slimmer and the weft can be cut narrow. Fine hair can sometimes carry a short flat-weft row, but tape-ins remain the safer default at low density.
Do tape-ins or wefts show more in a ponytail?
Tape-ins are marginally flatter, so they hide best in a high ponytail or a sleek updo. A flat weft placed correctly is very close behind. Either way, placement is what decides it: rows set too high or too close to the nape are what show when hair goes up, which is why an experienced stylist maps the sections before applying anything.
Butterfly Weft vs Genius Weft: Which Weft Suits Your Hair?
Quick answer
In the butterfly weft vs genius weft comparison, the difference is the base. A butterfly weft has a flat silk base with pre-punched holes that threads straight onto silicone-lined microbeads, no sewing. A genius weft is an ultra-thin machine-woven track under 0.7mm that your stylist cuts to width and beads or sews in.
Both of these sit in the same category on paper: professionally installed, 100% Remy human hair, worn for months rather than hours. But they behave differently once they are on your head, and the right answer depends on how much hair you already have, how your scalp tolerates weight, and how long you want to sit in the chair. Here is what actually separates them.
In this guide
What a butterfly weft actually is
What a genius weft actually is
Butterfly weft vs genius weft at a glance
How each one goes in, and how long it takes
Which weft suits your hair type
Colour matching and blending at the root
Maintenance, longevity and cost over time
Frequently asked questions
New to semi-permanent extensions?
Wefts are one of several professional methods, alongside tape-ins, nano tips and hot fusion U-tips. It helps to see how they sit next to each other before you commit to one.
Browse the semi-permanent professional range →
What a butterfly weft actually is
A butterfly weft is built on a flat, flexible silk base with a thin polyurethane foundation, and that base has small holes punched through it at set intervals. Those holes are the whole point. Your stylist sets a row of silicone-lined microbeads on your own hair, threads the weft onto them through the pre-punched holes, then flips the weft over so the beads sit hidden underneath against the scalp.
No sewing. No glue. No tape. That is unusual for a weft, and it is why the install is so much faster than people expect.
The band is bendable, so it follows the curve of your head rather than sitting as a rigid strip across it. Superior Hair supplies butterfly wefts in 20 inch (50g) and 24 inch (60g), each weft 36cm wide. There is also a refined version, the invisi butterfly weft, re-engineered to sit even flatter for clients who want the row undetectable when their hair is up.
The trade-off is that the holes are placed for you. A butterfly weft can be shortened, but the pre-punched spacing has to be respected, so a stylist works within a fixed pattern rather than cutting freely.
What a genius weft actually is
A genius weft solves a different problem. For years stylists had two imperfect options: a traditional machine weft, durable and cuttable but with a visibly thicker seam, or a hand-tied weft, beautifully thin but impossible to cut without unravelling, and prone to shedding return hair.
The genius weft uses a tighter method of machine weaving that removes the return hair entirely while keeping the track under 0.7mm thin. Crucially, it can be cut anywhere along the seam without unravelling. That is the feature stylists actually care about, because the row can be sized exactly to the section rather than folded over or doubled at the ends.
Superior Hair's genius weft range comes in 20 inch (50g) and 24 inch (60g), on an 80cm track, in over 30 shades. Because the track is so long and fully cuttable, one weft often covers more of the head than the width suggests, and multiple wefts can be stacked to build density or blend two shades through the mid-lengths.
There is one specific aftercare warning worth knowing before you buy: the active ingredients in Olaplex can break down the band on a genius weft. It is fine on the hair itself, but it should not be worked into the track.
Butterfly weft vs genius weft at a glance
Butterfly weft
Genius weft
Base
Flat silk base with polyurethane foundation and pre-punched holes
Tightly machine-woven track, under 0.7mm, no return hair
Attachment
Threaded onto silicone-lined microbeads, then flipped. No sewing, glue or tape
Beaded foundation, sewn or beaded on by a stylist
Cutting
Limited, must work with the pre-punched hole spacing
Cut anywhere along the seam without unravelling
Weight and length
20 inch 50g, 24 inch 60g, 36cm wide
20 inch 50g, 24 inch 60g, 80cm track
Typical install time
Around 15 minutes per weft
Roughly 2 to 3 hours for a full head
Move-up interval
4 to 6 weeks
6 to 8 weeks
Best for
First-time weft wearers, fast appointments, clients who want minimal fuss
Fine to medium hair, custom colour blends, stacked density
How each one goes in, and how long it takes
Neither of these is a DIY method. Both are installed by a qualified stylist, and that is not a sales line, it is a tension issue. A weft applied at the wrong angle or pulled too tight at the root puts sustained load on a small number of your own strands, which is how traction damage starts.
The practical difference is chair time. A butterfly weft threads onto a prepared bead row in roughly 15 minutes per weft, so a partial head can be done in one short appointment. A full head of genius wefts usually runs 2 to 3 hours, because each row is measured, cut to the section, and beaded or sewn individually.
That extra time buys precision. If you have an uneven hairline, a cowlick at the nape, or you want two shades blended through the mid-lengths, the cuttable genius track lets your stylist build exactly what your head needs. If you mostly want length without a long appointment, the butterfly system is the more efficient route. Our breakdown of the permanent installation methods we work with covers how wefts compare to bonded methods.
Not sure of your shade?
Weft rows sit close to the scalp, so the shade has to be right at the root, not just at the ends. Send us a photo in natural light and we will match you before you order.
Get a free colour match
Which weft suits your hair type
Fine hair
Fine hair is the clearest case for a genius weft. Under 0.7mm means the track disappears against the scalp, and because there is no return hair there is nothing loose to catch the light or irritate a sensitive scalp. Your stylist can also cut shorter rows and spread the weight across more of the head, which matters when each of your own strands can only carry so much.
One honest caveat: very fine or sparse hair may not support a full head of wefts at all. If you can see scalp through the top or your ponytail has thinned noticeably, a topper or a scalp fill-in is usually the better answer than a weft row, and a stylist should tell you that before taking your deposit.
Medium to thick hair
Both work well here. Medium hair hides either base easily, so the decision comes down to the appointment itself. Thick hair benefits from the genius weft's stackability, since two wefts on one bead row build density through the mid-lengths without adding more rows to the scalp.
Wavy and curly hair
Texture is forgiving of both bases, because the movement in your own hair breaks up any line at the row. Watch the length instead. Curl shrinks, so a 20 inch weft will not read as 20 inches once it dries, and your stylist may need to size up or cut the weft into your natural shape.
First-time wearers
If you have never worn semi-permanent extensions, the butterfly weft is the gentler introduction. The install is short, nothing is glued or sewn into your hair, and if you decide after six weeks that extensions are not for you, the beads come out without adhesive residue. You can see both ranges together in the butterfly and genius weft collection.
Colour matching and blending at the root
Wefts sit higher on the head than most people expect, which makes root colour the deciding factor. A shade that blends perfectly at the ends but sits two levels lighter at the row will show every time you tuck your hair behind your ear.
Three things to get right. Match to your root and mid-length, not your ends, since your ends are usually lighter from sun and heat. Account for a root shadow if you wear one, because a rooted or balayage weft will blend through a grown-out base far better than a solid block colour. And remember these are Remy human hair, so a stylist can tone or gloss them down toward your base, but lightening them is not recommended and will compromise the cuticle.
Each line has its own shade chart, because the two bases take colour slightly differently. Compare the butterfly weft colour guide against the genius weft colour guide before you settle on a number, and if you are between two shades, a colour ring is worth ordering first.
Maintenance, longevity and cost over time
Butterfly wefts need repositioning every 4 to 6 weeks. Genius wefts hold slightly longer at 6 to 8 weeks. Both intervals move depending on how fast your hair grows and how much oil your scalp produces, so an oily scalp will usually sit at the shorter end of the range.
The hair itself outlasts the install by a long way. A genius weft can be reused up to four times with proper care, and either line will give you up to a year of wear before the hair needs replacing. That reframes the cost. A 20 inch weft starts around $289 NZD, and once you divide that across a year of wear the recurring expense is really your move-up appointments, not the hair.
Aftercare is the same discipline for both. Wash two to three times a week with a sulphate-free shampoo. Keep conditioner and treatments off the attachment points and along the mid-lengths only. Never brush wet hair, and never sleep on it wet. Avoid coconut oil and alcohol-based products, which loosen bonds and beads over time. Keep heat tools moderate and off the row entirely. Our hair care guide has the full routine, and the one extra rule for genius wefts is to keep Olaplex away from the band.
If you want the fuller background on how the genius weft came about and why stylists moved to it from hand-tied, we wrote about that when the genius weft joined the range.
Ready to have your wefts put in properly?
Wefts are a professional method, and the install is what decides whether they sit flat, hold their tension and last the full interval.
Book a professional installation →
Frequently asked questions
Which is better, a butterfly weft or a genius weft?
Neither is better outright. A butterfly weft installs in about 15 minutes with no sewing, glue or tape, which suits first-time wearers and short appointments. A genius weft is under 0.7mm thin and can be cut anywhere along the seam, which suits fine hair and custom colour blends. Your hair density and how long you want to sit in the chair decide it.
Can I install a butterfly weft or genius weft myself?
No. Both are semi-permanent professional methods that require a qualified stylist. Sectioning, bead placement and root tension all have to be correct, because a row set too tight puts sustained load on your own strands and can cause traction damage. Clip-ins and halos are the methods designed to be fitted at home.
How long do butterfly wefts and genius wefts last?
Butterfly wefts need repositioning every 4 to 6 weeks and genius wefts every 6 to 8 weeks, as your own hair grows out from the row. The hair itself lasts much longer. A genius weft can be reused up to four times, and with correct aftercare either line gives up to a year of wear before the hair needs replacing.
Can genius wefts and butterfly wefts be cut?
A genius weft can be cut anywhere along the seam without unravelling, which is its defining feature and why stylists can size each row exactly to the section. A butterfly weft can be shortened, but the base has pre-punched holes at set intervals, so any cut has to respect that spacing to keep the weft usable.
Are wefts suitable for fine or thinning hair?
Fine hair often does very well with genius wefts, because the ultra-thin track lies flat and carries no return hair. Genuinely sparse or thinning hair is different. If scalp is visible through the top, a weft row may not have enough anchor hair to hold safely, and a topper or scalp fill-in is usually the better fit. A consultation will tell you which.
How many wefts do I need for a full head?
It depends on your natural density and the length you are adding. Each weft is 50g at 20 inches or 60g at 24 inches, and a genius weft's 80cm track can be cut into several shorter rows or stacked for density. Most full heads use two to four wefts, but your stylist should confirm that at consultation rather than online.
Quick answer
The best hair extensions for beginners are clip-ins or a halo. Both are 100% Remy human hair you put in and take out yourself in minutes, with no glue, heat or salon visit. Match the shade to your mid-lengths, start with a full set, and move to tape-ins only once you want longer wear.
If you are shopping for hair extensions for beginners, the choice looks bigger than it is. Two questions matter at the start: do you want hair you take out every night, or hair that stays in for weeks? And does the shade match the lengths of your own hair? Get those right and blending and aftercare get much easier.
In this guide
What are hair extensions?
Types of hair extensions, compared
Which type suits a beginner?
Choosing the right colour and texture
How to put in clip-in extensions, step by step
Caring for your extensions
Common beginner mistakes
Frequently asked questions
What are hair extensions?
Hair extensions are pieces of hair attached to your own to add length, thickness, or both. They come in two broad materials: synthetic fibre and real human hair. Synthetic is cheaper but melts under hot tools and tangles quickly. Human hair can be washed, curled and straightened like your own.
The grade of human hair matters as much as the material. Every Superior Hair extension is 100% Remy human hair, which means the cuticles are kept intact and aligned in the same direction, root to tip. Aligned cuticles lie flat against each other, so the hair tangles less, keeps its shine, and moves like natural hair. Non-Remy hair is often stripped with acid and coated in silicone, which looks glossy in the packet and turns dry and matted after a few washes. Superior Hair says its hair can last up to three years with proper care, largely because of those preserved cuticles.
New to extensions?
Ready-to-wear methods go in and come out at home, with no appointment and no commitment. They are the easiest place to start.
Browse ready-to-wear hair extensions →
Types of hair extensions, compared
Every method falls into one of two groups. Ready-to-wear (temporary) extensions you fit yourself and remove at the end of the day. Semi-permanent extensions are installed by a stylist and stay in for weeks at a time.
Ready-to-wear: clip-ins and halos
Clip-in extensions are wefts of hair sewn onto small pressure clips. You snap each one onto a section of your own hair near the root. Superior Hair's Classic Clip-Ins come as a 9-piece set in lengths from 14 to 26 inches. If your hair is fine and you worry about a bulky seam showing, the seamless clip-in extensions use a thin silicone base that sits flatter against the head.
Halo extensions are a single weft on a clear, adjustable wire. You place the wire around your crown like a headband and pull your own hair over it. Nothing is clipped, glued or taped to your hair, which makes a classic halo the fastest option going. The tradeoff: volume sits mostly at the back and sides, and you need enough hair on top to hide the wire.
Semi-permanent: tape-ins, bonds and wefts
Tape-in extensions are thin wefts with medical-grade adhesive. A stylist sandwiches a fine section of your hair between two tapes, so they lie completely flat. Ultra Seamless Tape-Ins are a popular first semi-permanent method because they are light and suit fine to medium hair. Expect a move-up appointment roughly every 6 to 8 weeks as your hair grows.
Nano tips and hot fusion U-tips attach individual strands, either with a tiny bead or a keratin bond melted with heat. They give the most natural movement but take the longest to install. Wefts (traditional, genius and butterfly) are rows of hair sewn or beaded onto a braid or track, and they suit thicker hair that can carry the weight.
All semi-permanent methods are fitted and removed by a trained stylist. They are not DIY jobs. If you are curious about a professional fit, Superior Hair's hair extension installation page explains what an appointment involves.
Method
Who fits it
How long it stays in
Best for
Clip-ins
You, at home
One day; out before bed
First-timers, events, full control of placement
Halo
You, at home
One day; out before bed
Fine or sensitive hair, speed
Tape-ins
Stylist
6 to 8 weeks per fit, then moved up
Fine to medium hair wanting daily wear
Nano tips / U-tips
Stylist
Several months with maintenance
Natural movement, longer commitment
Wefts
Stylist
Several weeks per fit
Thicker hair, big volume
Which type suits a beginner?
For most people, clip-ins. You control where the hair sits, you can take it out the moment it feels heavy, and if you do not love the look, nothing is stuck to your head for six weeks. A clip-in set also shows you what length and volume you like before you pay for a semi-permanent fit.
Choose a halo instead if your hair is very fine, if clips feel uncomfortable, or if you want something you can put on in the car. Choose tape-ins if you know you want extensions every single day and you are happy to book a salon visit every couple of months. Ask yourself honestly:
Will I wear them daily, or mainly for occasions?
Am I comfortable with regular salon appointments?
Do I have ten spare minutes each morning?
Is my hair long and dense enough to hide clips or tapes?
Still torn between the two most common options? This side-by-side on clip-in vs tape-in hair extensions goes deeper on cost, comfort and upkeep.
Choosing the right colour and texture
A wrong shade is the number one reason extensions look fake, and it has nothing to do with quality. Here is how to get it right.
Match your mid-lengths, not your roots
Your extensions blend with the hair around and below them, so match to your mid-lengths and ends in natural daylight. Roots are almost always darker and will throw you off. If you have visible regrowth or balayage, a rooted shade (darker at the top, lighter through the lengths) blends far better than a single flat colour.
Check your undertone
Warm hair leans golden, honey or copper. Cool hair leans ash, beige or icy. Most natural hair also carries a few tones at once, so a blended or multi-tonal shade usually looks more real than a solid one. Superior Hair stocks over 40 shades, so there is rarely a need to dye extensions to match.
Match your texture
Straight hair needs straight extensions, soft waves need a gentle wave, and curls need a matching curl pattern. If the textures differ, you will be heat styling every day just to make them blend, which is more work and more wear on both your hair and the extensions.
Not sure of your shade?
Send a photo of your hair in daylight and the Superior Hair team will recommend a shade for you, free of charge.
Get a free colour match
How to put in clip-in extensions, step by step
Expect 15 minutes the first time and about five once you have the hang of it.
Start with clean, fully dry hair. Clips slide on damp or oily roots. Condition only your mid-lengths and ends so the root area stays grippy.
Brush out every knot with a loop brush or wide-tooth comb.
Part a horizontal section at the nape with a tail comb and clip the rest of your hair up out of the way.
Add a little grip. Lightly backcomb the root of that section or mist on dry shampoo.
Place the first weft just below the part, close to the root but not pressed into the scalp. Snap the middle clip first, then the sides. It should feel secure, not tight.
Work upward in rows about 2 to 3 cm apart, using the wider wefts across the back and the narrow ones at the sides.
Stop a few centimetres below your part and away from the hairline, so there is enough natural hair on top to cover the clips.
Blend. Brush through, then curl or wave your hair and the extensions together so any layers disappear.
If a clip peeks through, drop that row a little lower. For a full walkthrough with photos, see how to install your clip-in extensions perfectly.
Caring for your extensions
Extensions get no natural oils from your scalp, so they dry out faster than your own hair. Care decides whether a set lasts months or years.
Washing
Superior Hair recommends washing ready-to-wear clip-ins and halos only every 15 to 20 wears. Semi-permanent extensions can be washed like your own hair, but limit it to two or three times a week. Use lukewarm water, massage gently rather than scrubbing, and choose products free from sulphates, parabens, alcohol, proteins and keratin, all of which strip the hair. Condition the lengths only and keep conditioner away from clips, tapes and bonds.
Brushing and heat
Always brush dry, never wet. Start at the ends and work up, holding the weft or bond area so you do not pull on it. Human hair extensions handle curling wands and straighteners, but use a heat protectant every time and keep tools on a moderate setting (around 180°C or lower is a sensible ceiling).
Sleeping and storage
Take clip-ins and halos out before bed, brush them, and store them fully dry in their box or a breathable pouch, out of direct sunlight. With semi-permanent extensions, brush before bed, tie your hair in a loose braid or low ponytail, and sleep on a silk or satin pillowcase. Never go to bed with wet hair.
One tip most beginners miss: some sunscreens containing avobenzone or oxybenzone can stain light extensions orange or pink. Mineral sunscreens with zinc oxide are safer. The full Superior Hair care guide covers this and more.
Common beginner mistakes
Extensions rarely damage hair on their own. The damage comes from how they are worn.
Wearing clip-ins every day in the same spot. Constant tension on the same sections can cause breakage. Shift placement slightly and give your hair rest days.
Sleeping in temporary extensions. Clips pull and the hair mats overnight.
Clipping too close to the hairline or too high. Wefts show, and fine hair at the front cannot carry the weight.
Matching the shade to your roots. The lengths end up looking a different colour to yours.
Using regular shampoo and heavy oils. Sulphates dry the hair, and oils near tapes or bonds make them slip.
Pulling out tape-ins yourself. Tapes need a proper adhesive remover and a stylist. Forcing them out takes your own hair with them.
Avoid these, and hair extensions for beginners are an easy, low-risk way to get more length and volume.
Start with the set most beginners choose
Classic Clip-Ins are 100% Remy human hair in 9-piece sets from 14 to 26 inches, and go in at home in minutes.
Shop Classic Clip-In Extensions →
Frequently asked questions
What are the best hair extensions for beginners?
Clip-in extensions are the best choice for most beginners. You fit them yourself in minutes, remove them every night, and there is no glue, heat or salon appointment involved. A halo is an even simpler alternative for fine hair. Move to tape-ins once you know you want extensions every day.
Are hair extensions safe for beginners?
Yes, when they are applied and cared for properly. Damage usually comes from clips placed too tightly, extensions worn to bed, or semi-permanent methods removed at home. Place clips on strong, clean sections, give your hair rest days, and leave tape-ins, nano tips and U-tips to a trained stylist.
How long do hair extensions last?
It depends on the method and your care routine. Superior Hair says its 100% Remy human hair can last up to three years with proper care. Clip-ins and halos last longest because they are worn less often. Tape-ins are typically moved up every 6 to 8 weeks and can often be reused for several fits.
Can I sleep or shower with hair extensions in?
Not with clip-ins or halos. Take them out before sleeping or showering. Semi-permanent extensions like tape-ins stay in while you sleep and wash. Brush them before bed, tie your hair in a loose braid, use a silk pillowcase, and never go to sleep with wet hair, as that causes tangling and matting.
How do I choose the right shade of hair extensions?
Match the extensions to your mid-lengths and ends in natural daylight, not to your roots. Check whether your hair leans warm or cool, and pick a blended or rooted shade if your colour has dimension. If you are unsure, Superior Hair offers a free colour match service from a photo of your hair.
How often should I wash clip-in hair extensions?
Superior Hair recommends washing clip-ins and halos every 15 to 20 wears, since they do not pick up oil from your scalp. Use lukewarm water and a sulphate-free, paraben-free shampoo, condition only the lengths, and let them air-dry completely before storing them in their box or a breathable pouch.
Recession Blonde: How to Maintain Your Blonde Hair Without Breaking the Bank
Blonde hair has always been one of the most requested salon colours, but maintaining the perfect blonde can quickly become expensive. Between regular touch-ups, toners, treatments, and at-home products, the cost of staying blonde can add up fast.
That's exactly why we're seeing the rise of "recession blonde" — a more natural, lower-maintenance approach to blonde hair that allows you to stretch out salon appointments without sacrificing beautiful results.
The good news? Hair extensions can play a major role in helping you maintain a bright, dimensional blonde while reducing the need for frequent colouring.
What Is Recession Blonde?
Recession blonde is less about giving up blonde hair and more about being strategic with how you maintain it.
Instead of aiming for a high-maintenance platinum or heavily highlighted look that requires constant upkeep, recession blonde embraces softer grow-out, natural root blending, and lived-in colour techniques. The goal is to create a blonde that looks intentional even as your natural hair grows.
Many clients are choosing:
Softer root shadows
Lived-in blondes
Dimensional highlights
Balayage techniques
Face-framing brightness
Lower-maintenance colour placements
The result is a blonde that looks expensive without requiring salon visits every few weeks.
Why More Women Are Choosing Low-Maintenance Blonde
The appeal of recession blonde goes beyond saving money.
Many women are also looking for:
Less damage from frequent lightening
Healthier-looking hair
Reduced salon maintenance
More natural grow-out
Longer-lasting colour results
A softer blonde often appears healthier because the hair isn't being repeatedly processed. This can be especially beneficial for those who already use hair extensions or are trying to improve the overall condition of their hair.
How Hair Extensions Can Help You Stay Blonde Longer
One of the smartest ways to maintain a bright blonde look is by using hair extensions.
Rather than continually lightening your natural hair to achieve extra brightness or dimension, extensions can provide those lighter tones instantly.
Benefits of blonde hair extensions include:
Added brightness without additional bleaching
Extra dimension and colour variation
Fuller, thicker-looking hair
Reduced need for frequent highlighting
Less stress on natural hair
Many clients find they can extend the time between colour appointments because their extensions help maintain the overall blonde appearance.
Strategically placed blonde extensions can create the illusion of a freshly coloured look, even when your natural roots have grown out.
Embrace Root Shadowing and Natural Regrowth
For years, visible roots were considered something to hide.
Today, they're part of the trend.
A well-executed root shadow creates a softer transition between your natural colour and your blonde lengths. This allows your hair to grow naturally without obvious regrowth lines.
When paired with blonde extensions, the overall result remains bright, dimensional, and polished while significantly reducing maintenance costs.
Be Careful With Purple Shampoo and Hair Extensions
Purple shampoo is often recommended for blonde hair, but extension wearers need to be particularly cautious.
Unlike natural hair, hair extensions are highly porous and can absorb pigment much more quickly. Leaving purple shampoo on extensions for too long may cause unwanted staining, dullness, or uneven colour deposits.
To protect your extensions:
Focus purple shampoo primarily on your natural hair.
Avoid leaving toning products sitting on extension lengths.
Rinse thoroughly and immediately.
Follow with a hydrating conditioner.
Use toning products sparingly.
Because extension hair doesn't receive natural oils from the scalp, it can hold onto colour pigments more aggressively than your own hair.
If you're unsure, always follow the care recommendations provided by your extension supplier.
Invest in Quality Hair Care
A major part of recession blonde is making your colour last longer. Using high-quality hair care products can help preserve your blonde and reduce the need for corrective salon visits.
Look for:
Sulphate-free shampoos, Olaplex No.4 Bond Maintenance Shampoo is a sulphate-free shampoo designed to cleanse gently while helping to maintain moisture and reduce breakage in both coloured hair and human hair extensions.
Colour-safe conditioners. L'Oréal Paris EverPure Moisture Conditioner is a gentle, 100% sulphate-free and colour-safe formula that helps maintain moisture, softness and shine while protecting blonde and colour-treated hair between salon visits.
Heat protectants. Oribe Royal Blowout Heat Styling Spray is a premium heat protectant that helps shield hair and extensions from styling damage while adding smoothness and shine without heaviness.
Hydrating masks. Kérastase Blond Absolu Masque Cicaextreme is a deeply nourishing treatment mask designed specifically for blonde and lightened hair. It helps restore moisture, softness and shine without using harsh sulphates that can dry out extensions.
UV protection products. Hi Lift Thermal Heat Protector is an Australian salon favourite that provides both heat and UV protection to help prevent colour fade and dryness caused by the harsh Australian sun. It is sulphate-free and suitable for hair extensions.
Healthy blonde hair reflects light better, making it appear brighter and more vibrant between appointments.
Reduce Heat Styling Where Possible
Excessive heat styling can cause blonde hair to appear dull, dry, and brassy.
Try incorporating more heat-free styling methods into your routine, such as:
Overnight braids
Heatless curl techniques
Loose buns
Natural texture styling
Reducing heat exposure helps both your natural hair and your extensions maintain their condition for longer.
H2: Extend the Life of Your Colour Appointments
One of the biggest advantages of recession blonde is flexibility.
Instead of booking full colour appointments every six to eight weeks, many clients are choosing:
Toner refresh appointments
Face-framing touch-ups
Gloss treatments
Strategic highlighting
Extension colour refreshes
These services are often more affordable while still helping maintain a fresh blonde appearance.
Blonde Hair That Works Smarter, Not Harder
The recession blonde trend proves that maintaining beautiful blonde hair doesn't have to mean constant salon visits, expensive colour appointments, or compromising the health of your hair. By embracing softer grow-out, strategic colour placement, and high-quality hair extensions, you can enjoy a brighter, fuller, and more dimensional blonde for longer while keeping maintenance costs under control.
Ready to make your blonde work harder for you? Explore Superior Hair's range of blonde shades of Clip-In Hair Extensions, Seamless Clip-In Hair Extensions, Tape-In Hair Extensions, Nano Tip Hair Extensions, and Genius Weft Hair Extensions to add instant brightness, volume, and length without the need for additional bleaching. Whether you're stretching out colour appointments or transitioning to a more low-maintenance blonde, Superior Hair has the perfect extension solution to help you achieve salon-quality results every day.
Ready to Wear Hair Extensions: The Benefits of Each Method
Ready to wear hair extensions have become one of the most popular ways to transform hair quickly and effortlessly. Whether you’re looking for extra volume, longer lengths, or fuller styling for special occasions, there’s a method designed to suit different hair types, lifestyles, and styling goals.
One of the biggest advantages of ready to wear extensions is flexibility. They’re easy to apply, beginner-friendly, and ideal for anyone wanting a non-permanent transformation without salon maintenance.
At Superior Hair Extensions, there are several ready to wear hair extension options available, each offering unique benefits depending on your hair type and desired finish.
Why Ready to Wear Hair Extensions Are So Popular
Unlike permanent extension methods, ready to wear extensions can be applied and removed whenever needed. This makes them ideal for:
Everyday styling
Event hair
Beginners trying extensions for the first time
Flexible styling changes
Damage-free transformations
They’re also considered one of the easiest hair extension methods because they don’t require salon installation or ongoing maintenance appointments.
For many people, they offer the perfect balance of convenience, comfort, and natural-looking results.
Clip In Hair Extensions
Clip In Hair Extensions are one of the most versatile and beginner-friendly options available. They’re designed with secure clips attached to wefts that can be installed within minutes.
Clip In Extensions Benefits
Some of the biggest clip in extensions benefits include:
Quick application
Easy removal
Flexible styling
Instant volume and length
No salon commitment
Reusable wear
They’re ideal for people who want styling freedom without permanent attachment methods.
Best Hair Types for Clip Ins
Clip ins work particularly well for:
Medium hair density
Thick hair
Shoulder-length hair
Occasional wear styling
They’re also great for anyone wanting dramatic event hair or extra fullness for nights out.
For those wanting even more discreet blending, Seamless Clip In Hair Extensions offer a flatter, more lightweight finish.
Halo Weft Extensions
Halo Weft Extensions are often considered the easiest hair extension method because they sit on an invisible wire that rests comfortably on the head.
There are no clips, tapes, or bonds required.
Benefits of Halo Weft Extensions
Halo extensions are popular because they:
Apply in minutes
Feel lightweight
Require minimal styling experience
Create natural fullness
Reduce tension on the scalp
Work well for beginners
They’re one of the best damage free hair extensions options because there’s very little pressure placed on the natural hair.
Best Hair Types for Halo Extensions
Halo wefts are ideal for:
Fine to medium hair
Thin hair
People new to extensions
Everyday volume styling
They’re especially effective for those wanting subtle fullness rather than dramatic thickness.
Because they’re lightweight and comfortable, halo weft extensions are often recommended as hair extensions for fine hair and hair extensions for thin hair.
Scalp Fill In Hair Extensions
Scalp Fill In Hair Extensions are designed to target specific sparse areas rather than creating full-length transformations.
They’re perfect for adding density exactly where it’s needed most.
Benefits of Scalp Fill In Hair Extensions
The main benefits include:
Targeted volume
Crown coverage
Lightweight wear
Natural blending
Discreet placement
Quick application
These extensions are ideal for creating balance through finer sections of the hair without needing a full extension set.
Best Hair Types for Scalp Fill Ins
Scalp fill ins work best for:
Fine hair
Thinning hair
Sparse crown areas
Hair needing subtle density
They’re one of the most natural looking hair extensions options because they focus on enhancing existing hair rather than dramatically changing the overall style.
Choosing the Best Ready to Wear Extensions for Your Hair Type
Different hair types often benefit from different methods.
Hair Extensions for Fine Hair
For finer hair textures, lightweight options generally create the most natural result.
Best options include:
Halo weft extensions
Scalp fill in hair extensions
Seamless clip ins
These methods minimise bulk while still adding fullness and movement.
Hair Extensions for Thick Hair
Thicker hair usually requires more density to achieve a balanced blend.
Best options include:
Classic clip in hair extensions
Multiple wefts
Combination sets for extra volume
These provide enough fullness to match naturally thick hair from root to ends.
Which Ready to Wear Extensions Are Easiest?
If ease and speed are your main priorities, halo weft extensions are often considered the easiest hair extension method overall.
For people wanting more styling versatility, clip in hair extensions remain one of the most flexible choices.
If the goal is subtle enhancement and targeted fullness, scalp fill in hair extensions offer one of the most lightweight and natural solutions available.
The Benefits of Damage Free Hair Extensions
One of the reasons ready to wear extensions continue to grow in popularity is because they allow people to enjoy volume and length hair extensions without long-term commitment.
Benefits include:
No chemical application
No permanent bonds
Less tension on natural hair
Flexible wear
Easier maintenance
More control over styling
When applied correctly and cared for properly, ready to wear extensions can help achieve fuller hair while maintaining the health of your natural hair.
Find Your Perfect Ready to Wear Hair Extensions
The best extension method ultimately depends on your hair type, lifestyle, and styling goals. Whether you want dramatic volume, subtle fullness, or quick everyday styling, there’s a ready to wear solution designed to suit your needs.
Explore Classic Clip In Hair Extensions, Seamless Clip In Hair Extensions, Halo Weft Extensions and Scalp Fill In Hair Extensions at Superior Hair Extensions to find the perfect match for your hair goals.
Mix and Match Hair Extensions: How to Combine Methods for the Best Results
Creating a fuller, more customised look doesn’t always come down to choosing just one extension method. In fact, one of the biggest trends in modern hair transformations is learning how to mix and match hair extensions to create the perfect balance of volume, length, comfort, and natural blending.
Different methods serve different purposes, and combining them strategically can help achieve a more seamless finish tailored to your hair type, lifestyle, and styling goals. Whether you’re adding fullness to fine hair, creating extra density through the ends, or blending multiple shades together, the right hair extension combinations can completely transform the final result.
At Superior Hair Extensions, there are multiple extension methods designed to work beautifully together — from ready to wear hair extensions to professional salon-installed methods.
Why Mix and Match Hair Extensions?
No two heads of hair are the same, which is why a single method doesn’t always deliver the ideal result on its own. Mixing extension methods allows for a more customised approach based on:
Hair thickness
Natural density
Desired length
Styling habits
Areas needing extra fullness
Colour blending goals
For example, someone with naturally fine hair may need lightweight volume through the crown while also wanting fuller ends. Another person with thick hair may require multiple methods layered together to create a balanced, natural-looking finish.
Learning how to mix and match hair extensions gives you more flexibility and often produces a softer, more realistic transformation.
Choosing the Right Combination for Your Hair Type
Hair Extensions for Thin Hair
When selecting hair extensions for thin hair, lightweight methods usually work best to avoid excess tension and maintain a natural blend.
Some of the best combinations include:
Halo weft extensions paired with scalp fill in hair extensions
Butterfly wefts combined with smaller K-tip sections
Clip in hair extensions used strategically for event styling
Using multiple lightweight methods helps distribute volume evenly without placing too much weight in one area.
A halo weft can instantly add overall fullness, while scalp fill in hair extensions help target sparse sections around the crown or hairline for a more balanced result.
Hair Extensions for Thick Hair
For those with naturally dense hair, achieving a full head of hair extensions often requires layering methods together to match the natural thickness throughout the hair.
Popular combinations include:
Butterfly wefts with K-tip extensions
Wefts combined with clip in hair extensions for extra styling volume
Multiple weft rows blended with different lengths
Thicker hair generally needs more density through the mid-lengths and ends to avoid obvious separation between the natural hair and extensions.
Combining methods helps create a more cohesive finish with consistent thickness from root to ends.
Matching Butterfly Wefts with K-Tips
One of the most effective hair extension combinations is pairing butterfly wefts with K-tip extensions.
Butterfly wefts are ideal for:
Overall volume
Fullness through the back
Fast installation
Soft movement
K-tips are perfect for:
Filling smaller gaps
Adding detail around the face
Blending shorter layers
Creating invisible density
When used together, they create a highly customised result that looks natural from every angle. The wefts provide the main structure and fullness, while the K-tips refine the blend and soften the perimeter.
This combination is especially popular for clients wanting a full head of hair extensions without visible bulk.
Using Ready to Wear Hair Extensions with Salon Methods
Ready to wear hair extensions can also work alongside permanent methods to add occasional extra glamour or styling flexibility.
For example:
Clip ins can add temporary volume for events
Halo weft extensions can create quick weekend styling changes
Installed wefts can remain the everyday foundation
This approach allows you to maintain your regular extensions while still having the freedom to create bigger styles when desired.
It’s also a great option for influencers and content creators who regularly switch between different hairstyles and levels of volume.
Blending Different Shades Together
One of the biggest benefits of mixing methods is the ability to blend hair extensions in multiple shades for a more dimensional finish.
Rather than choosing one flat colour, combining tones can create:
Softer highlights
More natural depth
Better root blending
A sun-kissed effect
More seamless colour transitions
This technique works particularly well with:
Butterfly wefts
Clip in hair extensions
K-tips
Halo weft extensions
Blending different shades together creates movement and realism that closely mimics naturally coloured hair.
What You Need for a Full Head of Hair Extensions
Achieving a true full head of hair extensions depends on both hair density and desired length.
Generally, finer hair may need:
One lightweight weft
Scalp fillers
Strategic volume placement
Thicker hair may require:
Multiple rows
Combination methods
Additional detail pieces for blending
The goal is to create balance so the extensions feel integrated rather than obvious.
Using mixed methods often provides better overall coverage than relying on a single extension type alone.
The Benefits of Mixing Hair Extension Methods
There are many advantages to combining extension methods, including:
More natural blending
Better weight distribution
Customised density
Greater styling versatility
Easier colour matching
Fuller overall appearance
Improved comfort
Flexible styling options
When done correctly, mix and match hair extensions can create a highly personalised transformation that feels lightweight while still delivering maximum impact.
Best Methods to Pair Together
Some of the most effective combinations include:
Method Combination
Best For
Butterfly Wefts + K-Tips
Fullness with detailed blending
Halo Weft + Scalp Fillers
Fine hair and crown volume
Clip Ins + Wefts
Temporary extra glamour
Multiple Shade Wefts
Natural colour dimension
K-Tips + Wefts
Thick hair needing invisible blending
Create Your Perfect Hair Extension Combination
The best extension results often come from customisation rather than a one-size-fits-all approach. By learning how to mix and match hair extensions, you can create a look that suits your hair type, styling goals, and desired level of volume.
Whether you’re creating subtle fullness or a dramatic transformation, combining methods allows for a more customised result tailored to your hair type and styling goals. Explore the range of Clip In Hair Extensions, Halo Weft Extensions and Scalp Fill In Hair Extensions available at Superior Hair Extensions to build your perfect hair extension combination
The Importance of Good Hair Transformation
There’s something undeniably powerful about changing your hair. Whether it’s adding extra length, creating fuller volume, or completely refreshing your look, a great hair transformation can shift the way you feel almost instantly. It’s more than aesthetics — it’s confidence, energy, identity, and self-expression all wrapped into one.
For many women, hair becomes part of their personal story. It reflects mood, style, lifestyle, and even milestones. That’s why a professionally done hair extension transformation often feels emotional in the best possible way. It’s not simply about adding inches — it’s about reconnecting with the version of yourself you want to feel like again.
At Superior Hair Extensions, transformations are designed to feel natural, wearable, and confidence-boosting, whether you want subtle fullness or a dramatic makeover moment.
Why Hair Transformations Feel So Good
A fresh hairstyle has always carried emotional meaning. Think about how many people book salon appointments before major life events, holidays, birthdays, weddings, or career changes. Hair represents renewal.
An influencer hair transformation has become especially popular online because people connect emotionally to before-and-after results. Watching someone go from flat or lifeless hair to soft, voluminous, glossy extensions instantly creates that “wow” moment. It’s inspiring because it shows how powerful a transformation can feel.
But the real impact goes deeper than the visual result.
A beautiful transformation can help women feel:
More confident in photos
More polished day to day
More excited to style their hair
More comfortable expressing their personal style
More feminine and put together
That emotional shift is one of the biggest reasons hair extensions continue to grow in popularity.
The Emotional Benefits of Hair Extensions
The emotional benefits of hair extensions are often underestimated. While extensions obviously create length and volume, they also change the way many women carry themselves.
When your hair feels healthy, full, and styled the way you love, it often impacts:
Confidence
Self-esteem
Mood
Social confidence
Motivation to dress up and take care of yourself
For many women, investing in their appearance is also part of self care for women. Taking time to refresh your look can feel empowering rather than superficial. It becomes part of prioritising yourself again.
That’s why so many women describe their appointments as therapeutic. A salon visit or extension install can feel like pressing reset.
Influencer Hair Transformations & Social Media Culture
Social media has completely changed the beauty industry, especially when it comes to hair. Viral TikTok and Instagram transformations have shown just how dramatic a professional extension makeover can be.
An influencer hair transformation often focuses on:
Instant volume
Seamless blending
Long, glossy lengths
Soft waves and styling
Natural movement
Luxurious finishes
The appeal comes from how achievable the transformation suddenly feels. Women see relatable before-and-after results and realise they can achieve the same look themselves.
Extensions are no longer reserved for celebrities. They’ve become part of everyday beauty routines for women wanting fuller, healthier-looking hair without waiting years for growth.
Choosing the Right Hair Extension Transformation
Every woman’s ideal transformation looks different. Some want subtle thickness while others want dramatic length and volume. Choosing the right extension method is what creates the most natural finish.
Clip-In Hair Extensions for Instant Glam
If you love flexibility and easy styling, Classic Clip-In Hair Extensions are perfect for temporary volume and length. They’re ideal for events, weekends, content creation, or everyday wear without long-term commitment.
For women wanting fast results, clip in hair extensions are one of the easiest ways to create a stunning hair transformation within minutes.
Tape Hair Extensions for a Seamless Finish
For a more lightweight, salon-quality result, Tape In Hair Extensions are designed to sit flat against the scalp for a discreet, natural blend.
Many women choose tape hair extensions because they feel comfortable, blend beautifully, and work especially well for finer hair types.
They’re also one of the most popular choices for achieving natural-looking before and after hair extensions results.
Butterfly Weft Extensions for Volume & Thickness
If your goal is fuller, more luxurious hair, Butterfly Weft Extensions are designed to create maximum body while still feeling soft and wearable.
Butterfly weft extensions are ideal for women wanting:
Dramatic thickness
Long-lasting wear
Soft movement
Fuller styling results
These are especially popular for women wanting more noticeable makeover hair extensions results.
Genius Weft Extensions for a Lightweight Luxury Feel
For women wanting a refined, flexible extension method, Genius Weft Extensions offer an ultra-thin weft design that blends beautifully into natural hair.
Genius weft extensions are loved for their:
Lightweight feel
Comfortable wear
Invisible finish
Natural movement
Flexible application
They’re perfect for women wanting a polished transformation that still feels effortless and modern.
Hair Transformations as Self Care
One of the biggest reasons women invest in extensions is simple: it makes them feel good.
In a world where women are constantly balancing work, relationships, routines, and responsibilities, beauty rituals often become moments of personal reset. Investing in yourself isn’t vanity — it’s confidence care.
A beautiful hair extension transformation can help women reconnect with themselves again. It’s the reason so many clients leave appointments smiling differently, standing taller, and feeling more confident than when they walked in.
That’s the real power behind confidence boosting hair extensions.
The Confidence Behind the Before & After
There’s a reason people love transformation content so much. The magic isn’t only in the hair — it’s in the confidence that comes after.
The best before and after hair extensions results don’t look overdone. They look effortless, healthy, glossy, and natural. The goal is always to help women feel like the best version of themselves.
Whether you’re after subtle fullness or a dramatic makeover, the right extensions can completely change how you feel day to day.
Explore the full range of premium Remy hair extensions at Superior Hair Extensions and discover the transformation that feels most like you.
The Ultimate Bombshell Blowout Guide with Hair Extensions – Inspired by Sabrina Carpenter
Photo: Cosmopolitan
Big, glossy, unapologetically voluminous hair is having a moment again—and no one is wearing it quite like Sabrina Carpenter. Her signature blowout strikes that perfect balance between polished and playful: lifted at the roots, smooth through the lengths, and finished with soft, bouncy movement.
The good news? You don’t need a salon booking to get the look. With the right prep, tools, and technique, you can recreate that bombshell blowout at home—and tailor it to your own hair type and length (yes, even if you’re using extensions).
Why This Blowout with Extensions Works
What sets this style apart from a standard blow-dry is its structure. It’s not just about drying your hair—it’s about building shape from the roots, creating direction through the mid-lengths, and locking in that signature curve at the ends.
Think:
Volume without frizz
Smoothness without flatness
Movement that lasts beyond the first hour
It’s a modern take on classic ‘90s glamour, softened for everyday wear.
Blowout Prep with Hair Extensions for the Best Foundation
A long-lasting blowout always begins before you even pick up a brush.
Freshly washed hair is ideal, but what matters more is how you prepare it. Hydration and protection are key here—you want your hair to feel soft and manageable, but not weighed down.
Work a lightweight heat protectant evenly through damp hair, focusing on mid-lengths and ends. This not only shields your strands from damage but also helps create that silky finish the style is known for.
If your hair tends to fall flat, now’s the time to introduce a volumising product at the roots. Keep it concentrated near the crown—too much through the lengths can reduce movement.
Blowout Rough Dry Techniques for Volume and Extensions
Before going in with a styling brush, remove most of the moisture using your fingers and a hairdryer.
Flip your head upside down or direct airflow upward at the roots to encourage natural lift. This step is often rushed, but it makes a noticeable difference—think of it as setting the stage for volume before refining the shape.
Aim to get your hair about 70–80% dry before sectioning.
Blowout Sectioning Tips for Seamless Extensions Blending
One of the biggest differences between a flat blow-dry and a full-bodied one is sectioning.
Divide your hair into clean, manageable layers—typically:
Bottom (nape area)
Middle (around the ears)
Top (crown and front sections)
Clip each section neatly. Working in smaller sections allows you to control tension and direction, which is essential for that smooth, lifted finish—especially when blending extensions.
Blowout Styling Techniques with Extensions for Maximum Volume
Now comes the defining step: shaping the blowout. Using a round brush or a blowout brush, start at the bottom section and work your way up. The key is tension and direction.
Lift at the Roots
Lift the hair upwards and slightly back from the face. This creates height and prevents the style from sitting flat against your scalp.
Smooth Through the Lengths
Glide the brush slowly while following with the nozzle of your dryer. Keep the airflow directed downward to smooth the cuticle and enhance shine.
Curve the Ends
Roll the brush under and hold for a few seconds with heat before releasing. This is what creates that soft, curved bounce—not tight curls, just a subtle flick.
Take your time here. Rushing leads to frizz and uneven shape, while controlled, consistent passes create that signature polished finish.
Blowout Face-Framing Techniques with Extensions
The front sections frame your face and define the overall look, so give them extra attention.
Blow-dry these pieces away from your face for that effortless, open feel. You can also slightly over-direct them (pulling them in the opposite direction before releasing) to create extra lift and movement.
This is where the “bombshell” effect really comes to life.
Blowout Setting Methods to Lock in Extensions Volume
Here’s the step most people skip—and why their blowout doesn’t last.
Once each section is dry and shaped, allow it to cool in place. You can:
Twist sections loosely and clip them
Or use velcro rollers for added volume
Cooling helps lock in the shape, meaning your hair holds its bounce for hours (or even days).
Even a few minutes makes a difference, so don’t skip it.
Blowout Finishing for Soft, Bouncy Extensions
Once your hair has completely cooled, gently brush through using a soft bristle or wide paddle brush.
This might feel counterintuitive after all that styling, but it’s what transforms structured sections into a seamless, flowing blowout.
The result? Soft, airy movement with that effortless, undone feel—never stiff or overly “done.”
Blowout Finishing Touches for Polished Extensions
Now it’s all about refinement.
A lightweight serum or shine spray can be smoothed through the ends to enhance gloss and tame any flyaways. Keep it minimal—you want bounce, not heaviness.
If you like a bit more hold, a flexible hairspray will help maintain volume without compromising movement.
Boost the Crown
For extra lift, gently tease the crown and smooth over the top layer for a polished finish.
Blowout with Extensions: Enhancing Volume and Length
If your natural hair struggles to hold volume or lacks thickness, extensions can take this look to another level.
Clip-in or tape-in extensions add density, which naturally enhances the fullness of a blowout. They also help the style hold its shape longer, especially through the ends where that signature bounce sits.
Blend Seamlessly
Choose extensions that match your texture and colour
Style them together with your natural hair
Focus on creating a seamless transition
When done right, extensions don’t just add length—they amplify the entire silhouette of the blowout.
Blowout Maintenance Tips for Extensions Longevity
A great blowout shouldn’t disappear after a few hours. With the right care, you can extend it for days.
Sleep with your hair loosely tied or wrapped to maintain shape
Use dry shampoo at the roots to refresh volume
Avoid excess moisture or humidity where possible
Lightly restyle the front pieces if needed
The beauty of this look is that it often gets better on day two—so don’t be afraid to embrace a slightly lived-in finish.
Final Thoughts on the Blowout with Extensions Look
The Sabrina Carpenter-inspired blowout is more than just a hairstyle—it’s a statement. It’s confident, feminine, and undeniably glamorous, while still feeling wearable for everyday life.
By focusing on preparation, technique, and setting the style properly, you can recreate that soft, voluminous finish at home—no salon required.
Whether you’re working with your natural hair or enhancing it with extensions, the goal remains the same: lift at the roots, smoothness through the lengths, and that iconic bounce at the ends.
Once you’ve mastered it, this is the kind of effortlessly glamorous style you’ll reach for time and time again. Complete the look with Superior Hair’s Classic Clip-In Hair Extensions for added volume, length, and that signature bombshell finish.
Just a quick heads up — the [product] is currently on pre-order, with at least a 2-week waiting period while we restock.
If you're happy to wait, place your order today to secure your hair. As soon as our new stock arrives, we'll ship it out right away.
One of our friendly team will also be in touch shortly to confirm your order. Thanks so much!
Just a quick heads up, we only have [ready_qty] of the [product] in stock, so your order is currently on pre-order, with an approximate 2-week production time.
If you're happy to wait, place your order today to secure your hair. As soon as our new stock arrives, we'll ship it out right away.
One of our friendly team will also be in touch shortly to confirm your order. Thanks so much!
Choosing a selection results in a full page refresh.